How to build a skill with Alexa
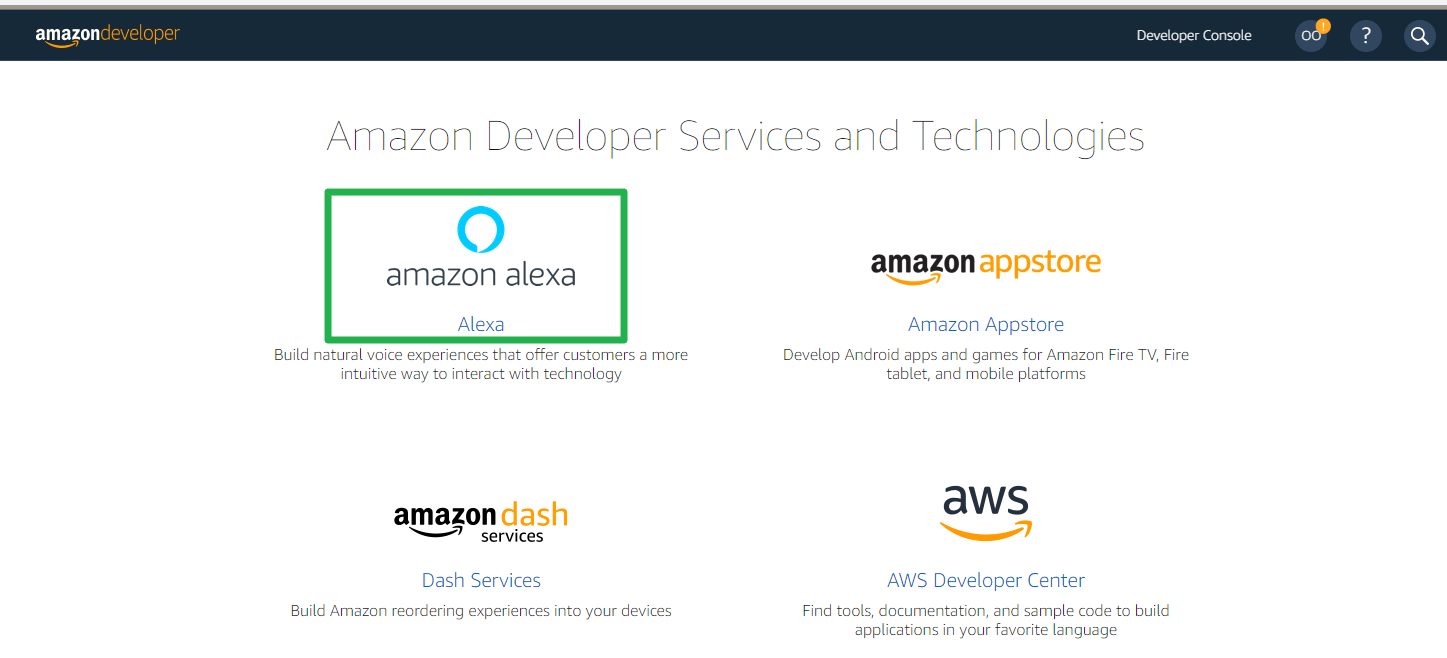
Alexa
Nowadays, most in-home tasks and daily activities are completed using voice commands/interactions. These activities ranges from flights bookings to music playback to setting alarms to listening to news/sports update to making-to-do list to shopping and lot more. This is where Amazon Alexa comes in play – Alexa in Short, is a virtual assistant that uses voice interaction to complete tasks for us. Overtime Alexa has been able to do more than just complete tasks for us, it is being used to control several smart devices and it’s being used as an home automation system. Users are also able to extend Alexa capabilities by building skills to it. These skills can be used to serve customers naturally, expand your reach, and even make money. Depending on you technology expertise, you can build skills for Alexa by coding it yourself using the Amazon Alexa API, or you can hire an agent to do the building for you, and in a more simpler way, you can always fill a blueprint template created for building skills by Amazon. In this post, I will be showing you how to build a skill for Alexa. With this knowledge, you can decide if you want to monetize you skill, or just do if for the fun. Without wasting time, let’s get into it.
Things needed to build skills for Alexa
To build your skills for Alexa, here are some of the few tools you will need to get started;
-
Amazon developers account: To get started with building skills for Alexa, you need to create a FREE developer account with Amazon. In this process you can use your existing amazon account or decide to create a new Amazon developer account by providing basic information about yourself.
-
Amazon Web Services (AWS) Lambda account: AWS Lambda is a service that lets you run code in the cloud without managing servers. Alexa sends your code user requests and your code can inspect the request, take any necessary actions and then send back a response. You can write Lambda functions in Node.js, Java, Python, C#, or Go.
-
Alexa Device: Although this item is optional, however, if you would like to test your skills in real time, it is advisable to get an Alexa device.
Your Amazon developers account
Once you’ve created your Amazon developer account, below are some steps to get you started on building your skill;
Click on amazon Alexa.
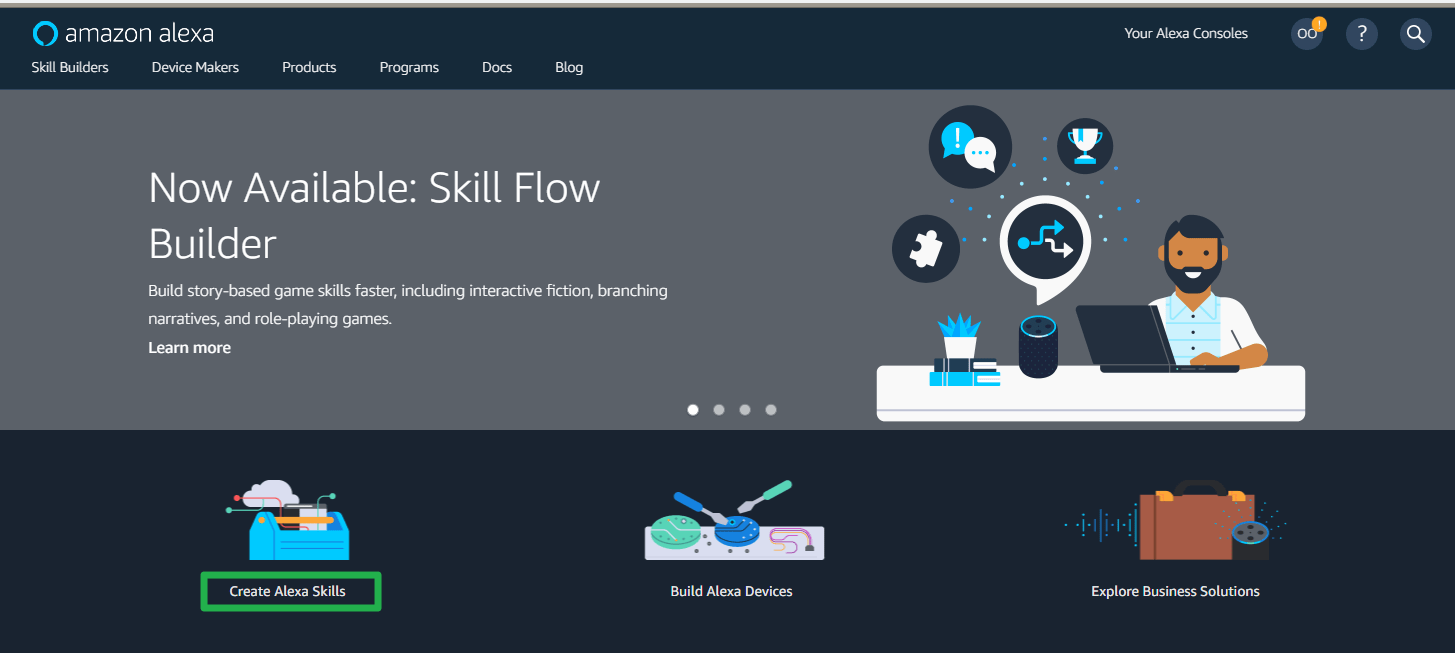
Click on Create Alexa Skills.
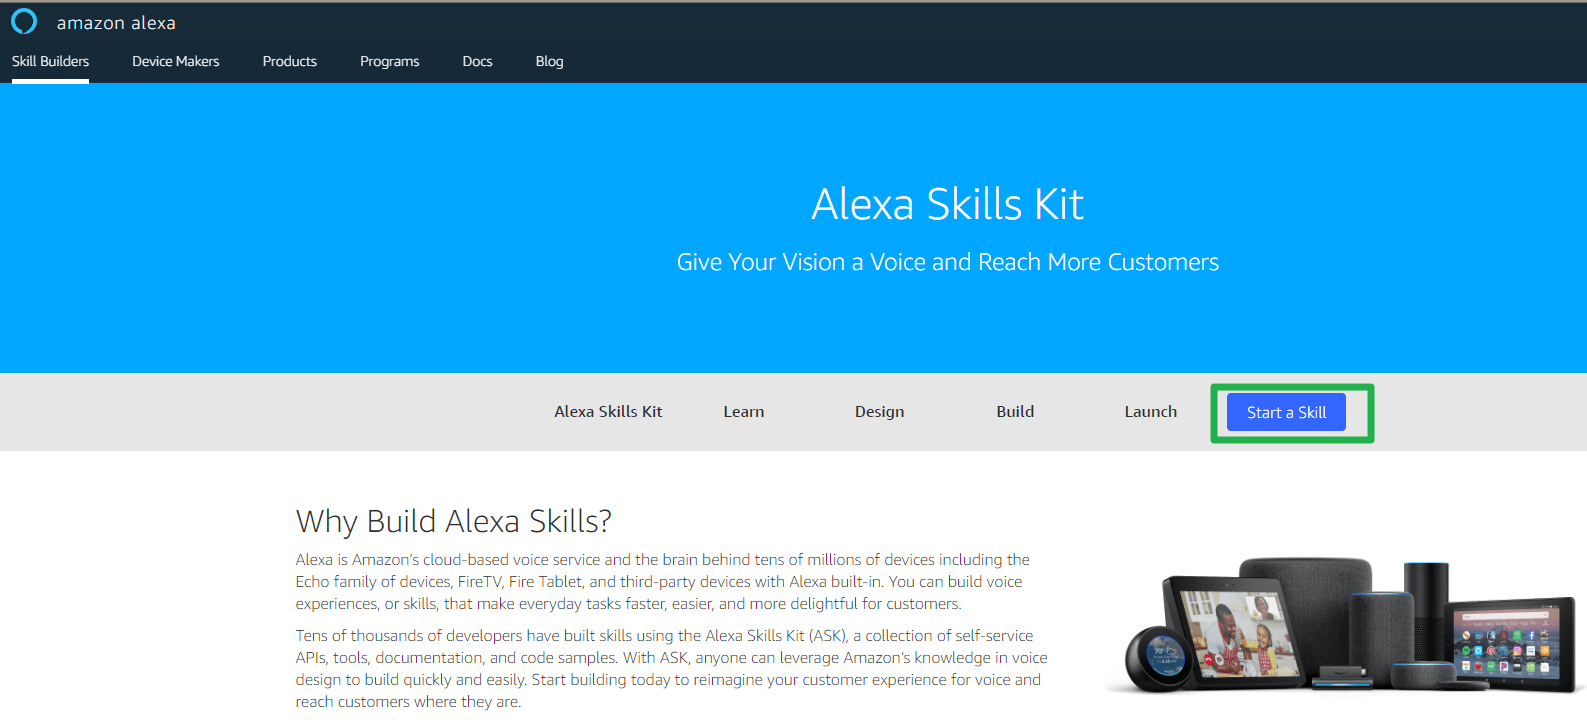
Click on Start a Skill.
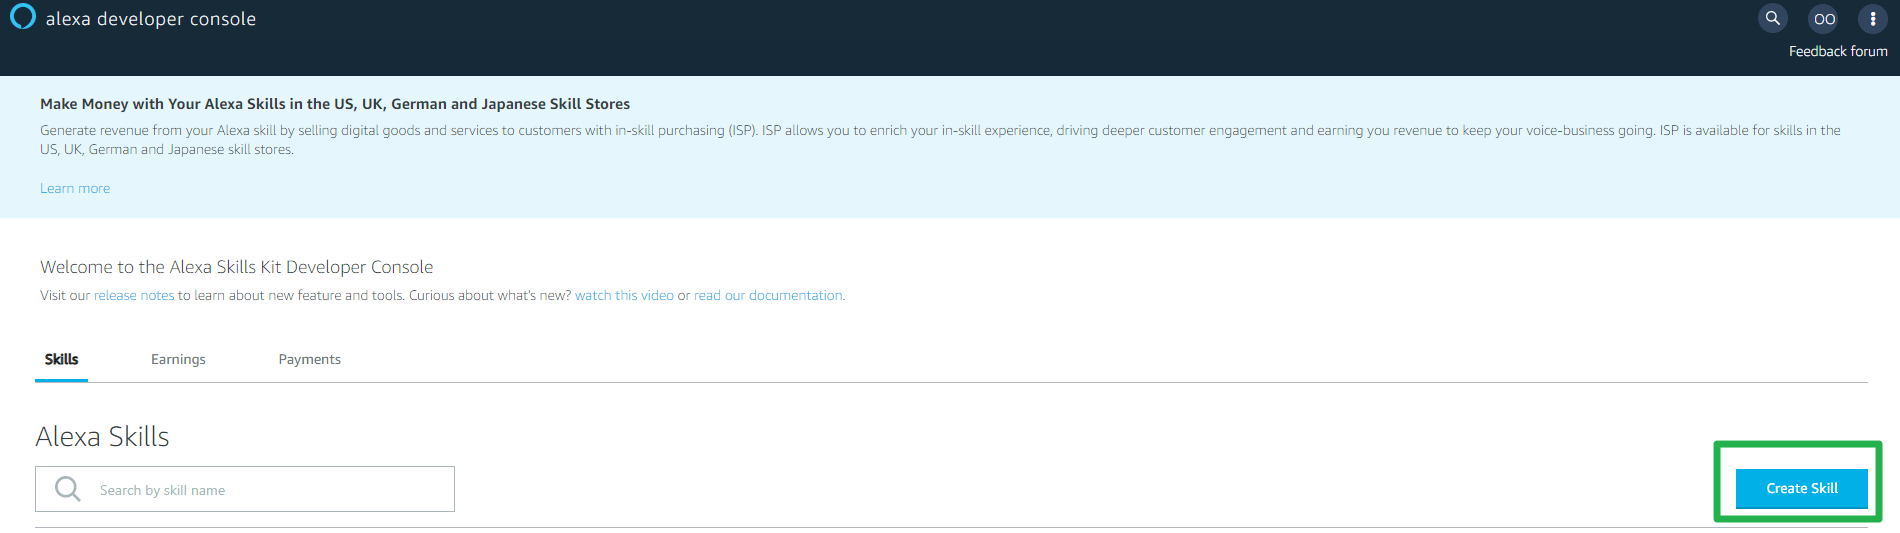
Click on Create Skill.
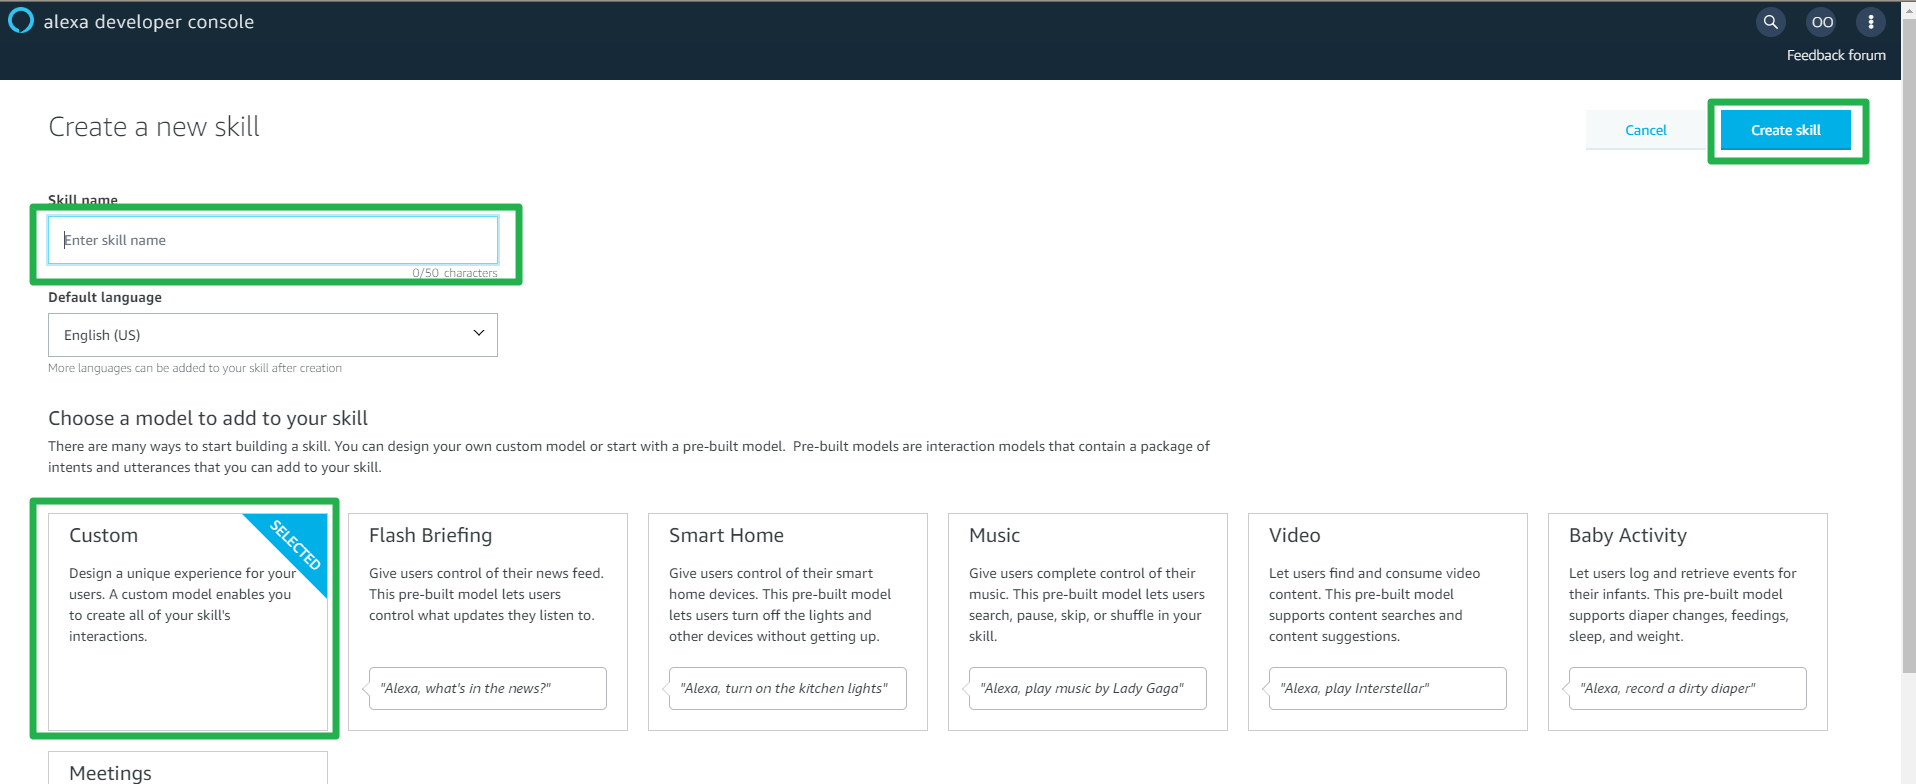
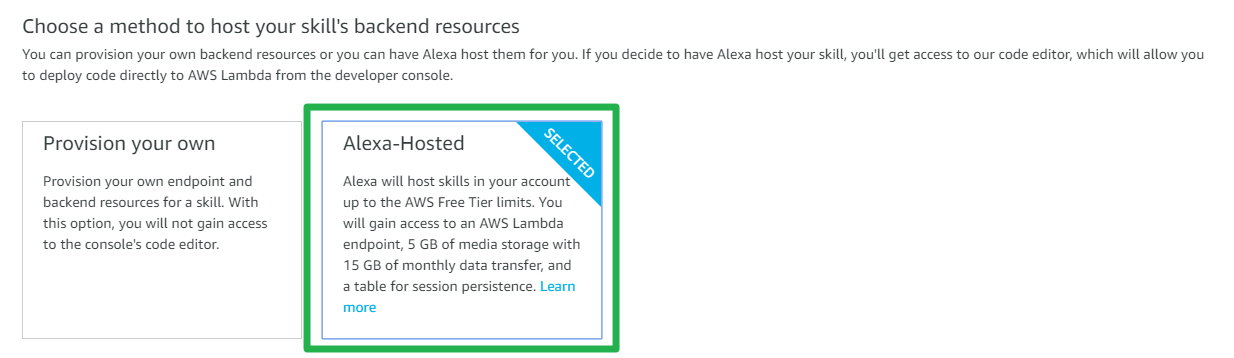
Choose a Name for your skill.

Select Custom model to add to skill.

Select Alexa-Hosted as the method to host your skill's backend resources.
Your Skill
In this example, I would be building a very simple skill that tell you facts about puppies. I have named this skill sayHello,
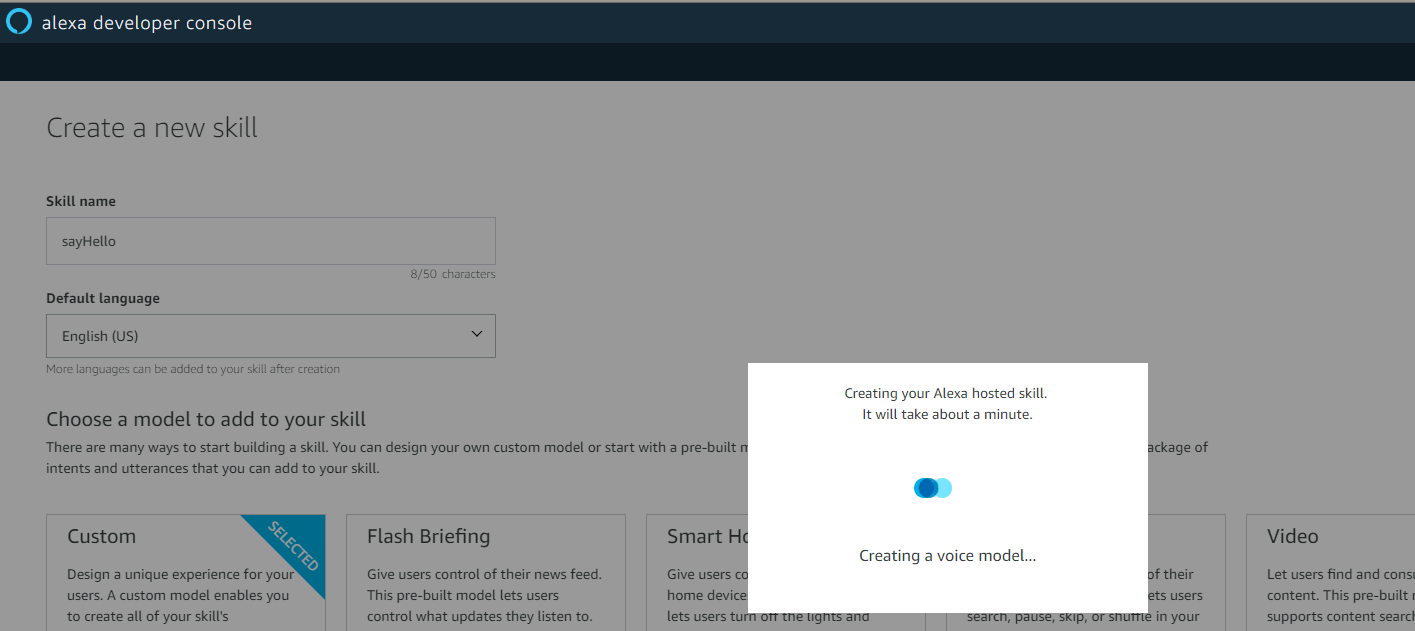
and this is what the developer console looks like once the skill has been created.

The first step in this skill is to determine the Invocation for your Skill. Users say a skill’s invocation name to begin an interaction with a particular custom skill. For instance, if the invocation name is “Puppies Fact “, users can say:
User: Alexa, get Puppies Fact to tell me about my Puppy
User: Alexa, Open Puppies Fact
You can change your invocation name at any time while developing a skill. You cannot change the invocation name after a skill is certified and published.
Note that the invocation name is only needed for custom skills. If you are using a pre-built model, users do not need to use an invocation name for the skill
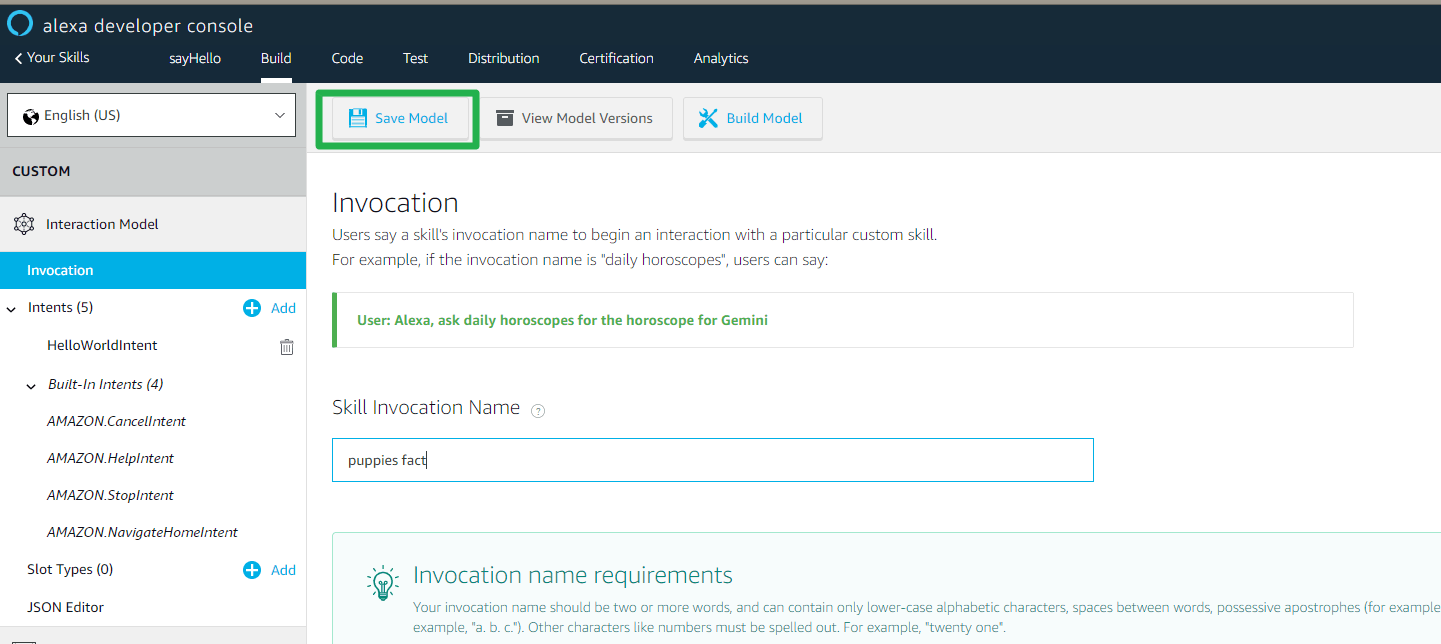
Describe your Skill invocation Name.
Click on Save Model
Next, we need to create our custom Intents, Utterances, and Slots. An intent represents an action that fulfills a user’s spoken request. Intents can optionally have arguments called slots. The sample utterances are set of likely spoken phrases mapped to the intents.
- The intent we would be creating would be called AboutPuppies. After the intent had been created, we would list different utterances the user would also say to invoke this intent.
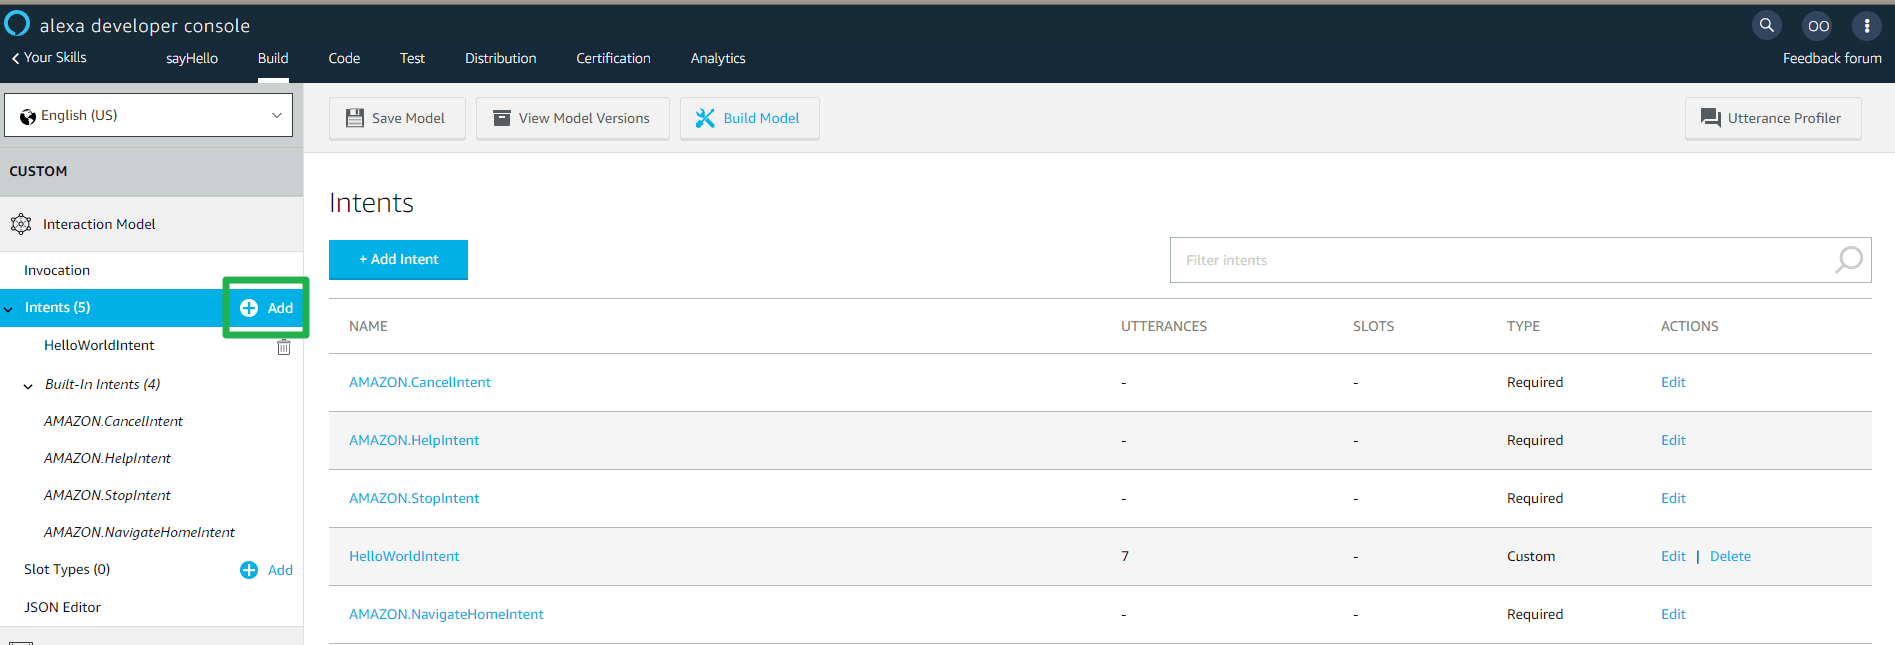
Click on Add new Intent.
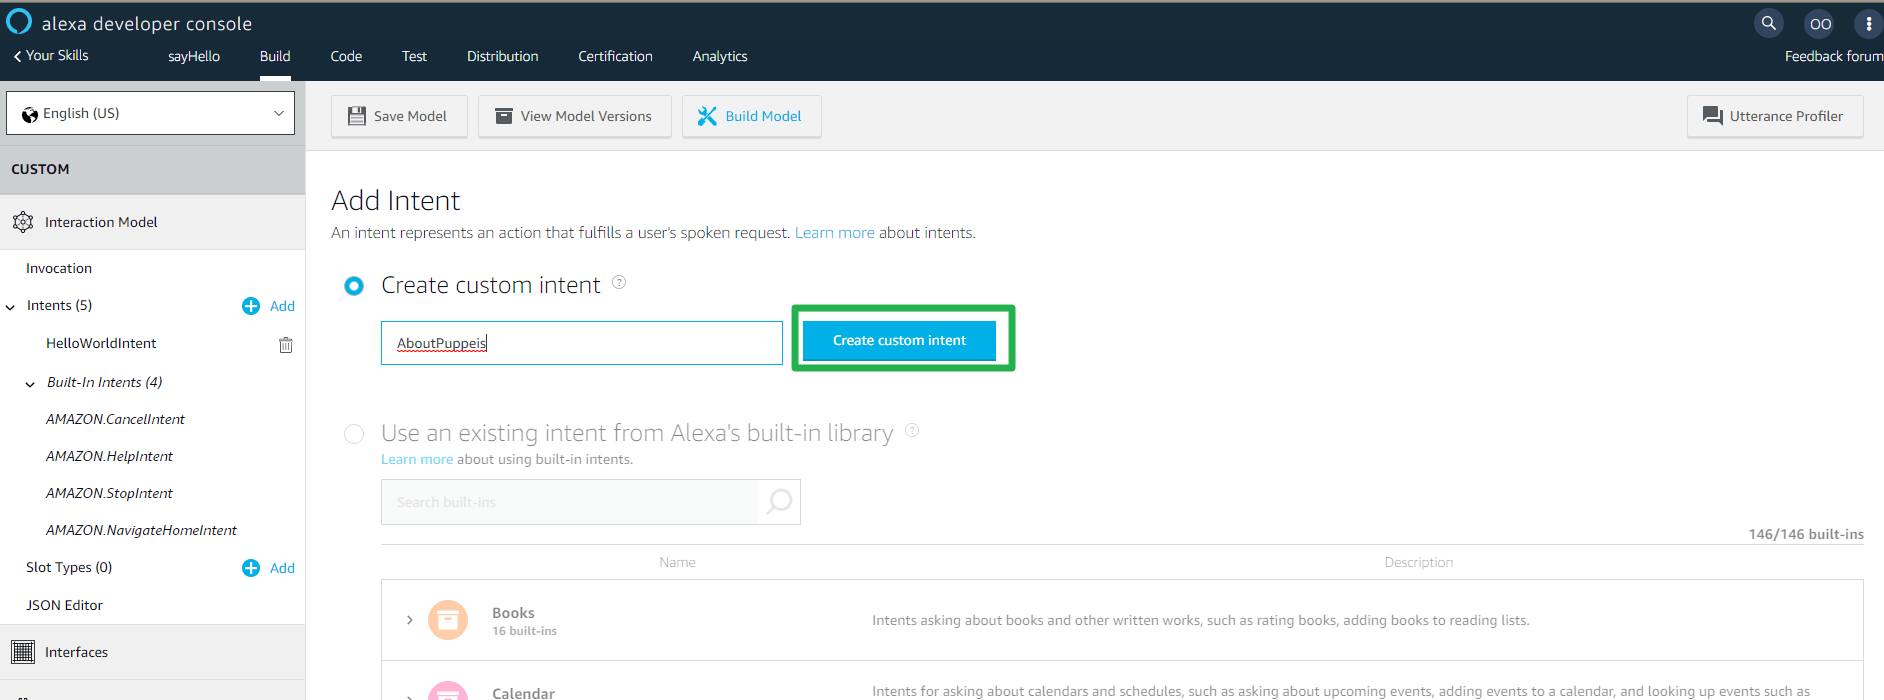
Name it what you wish.
Click on Create Custom Intent
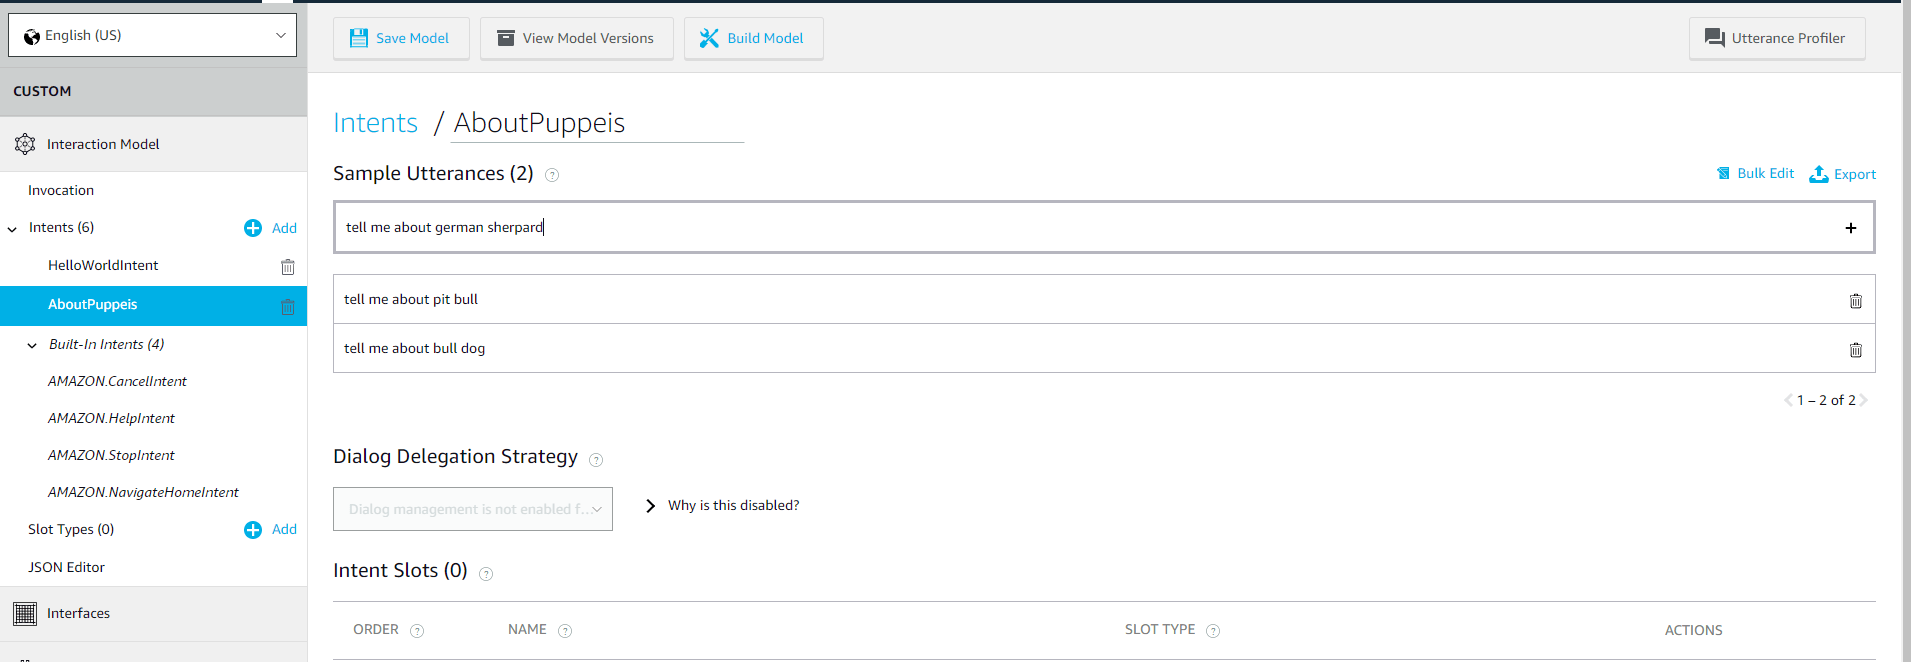
Think of any Utterances you could say pertaining to knowing about puppies
For instance, "Alexa, Tell me about German Shepard"
Note: You can/need to add as many utterances given the flexibility and variation
of spoken language in the real world, there will often be many different ways to
express the same request
- Once you have written a few utterances, note the words or phrases that represent variable information. These will become the intent’s slots. For instance, we know German Shepard, Pit Bull, Bull Dog are all example of puppies. Instead of typing all type of dog breeds, you can create a slot called puppies to hold this variable.
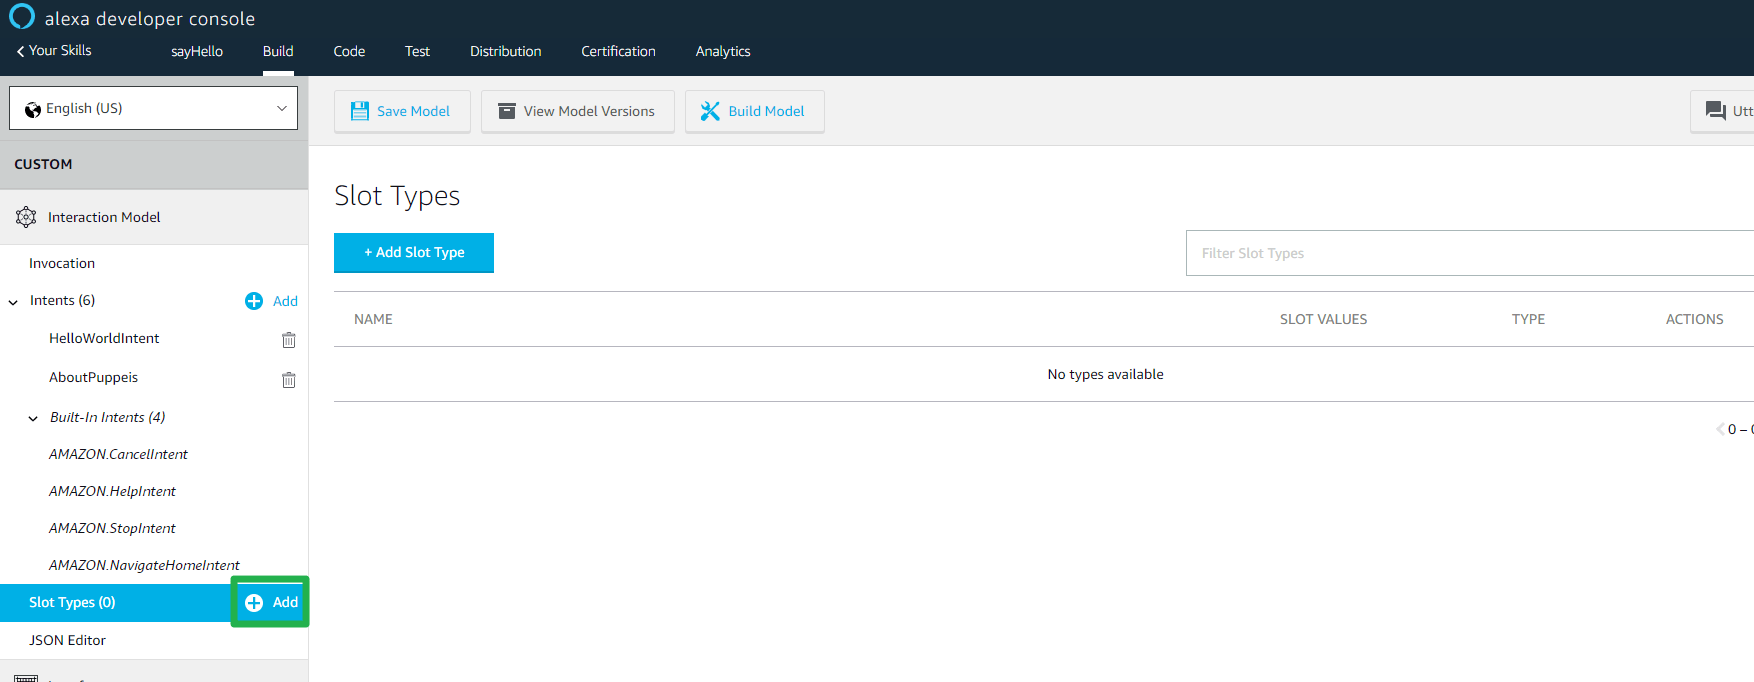
Click on Add new Slot.
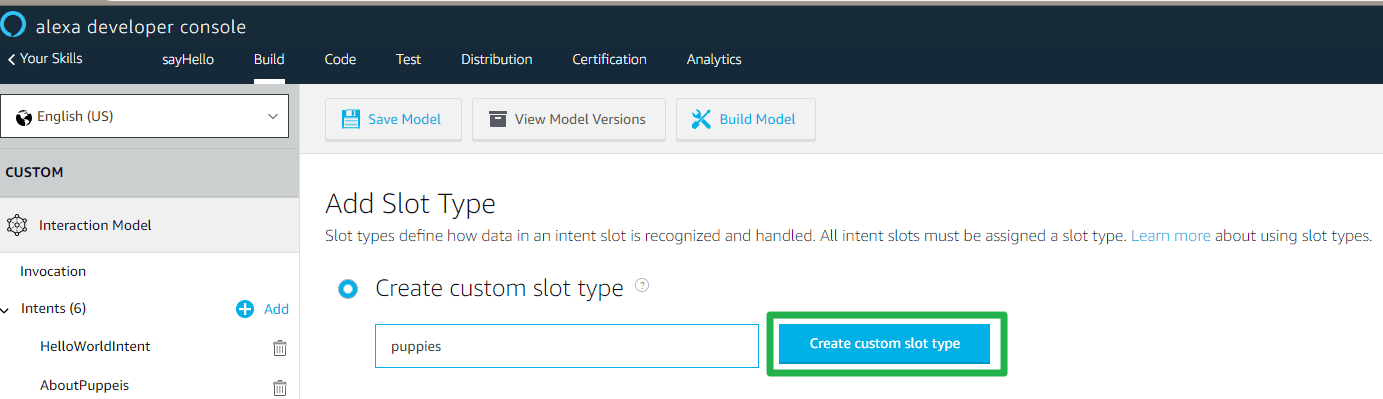
Name it what you wish.
Click on Create Custom slot type
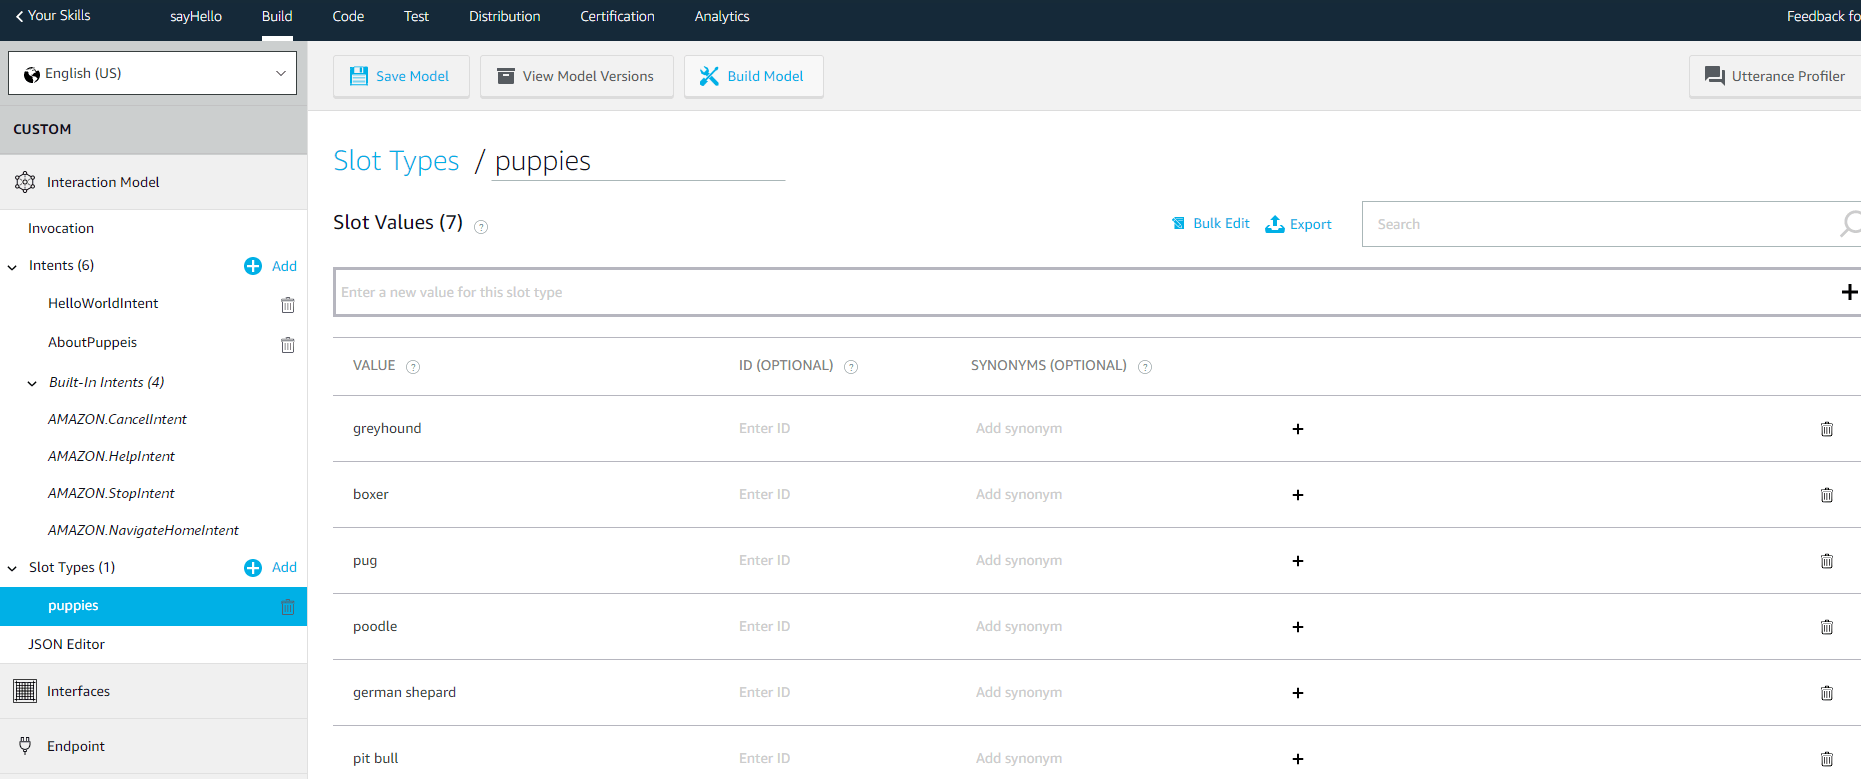
Give as many value you wish to add.
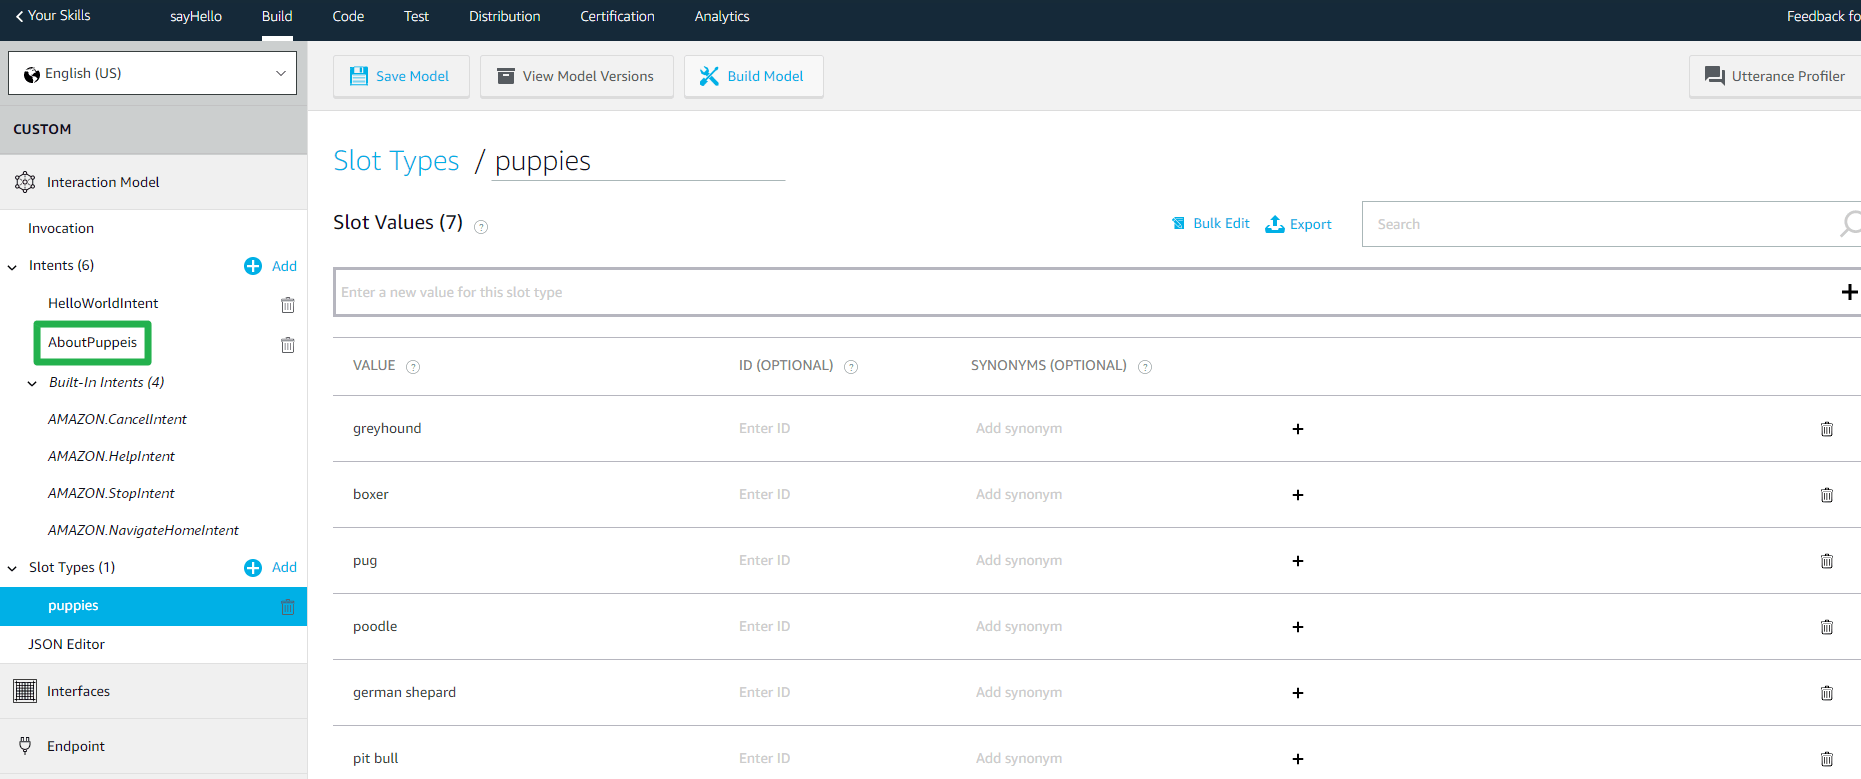
Go back to the Intent you created.
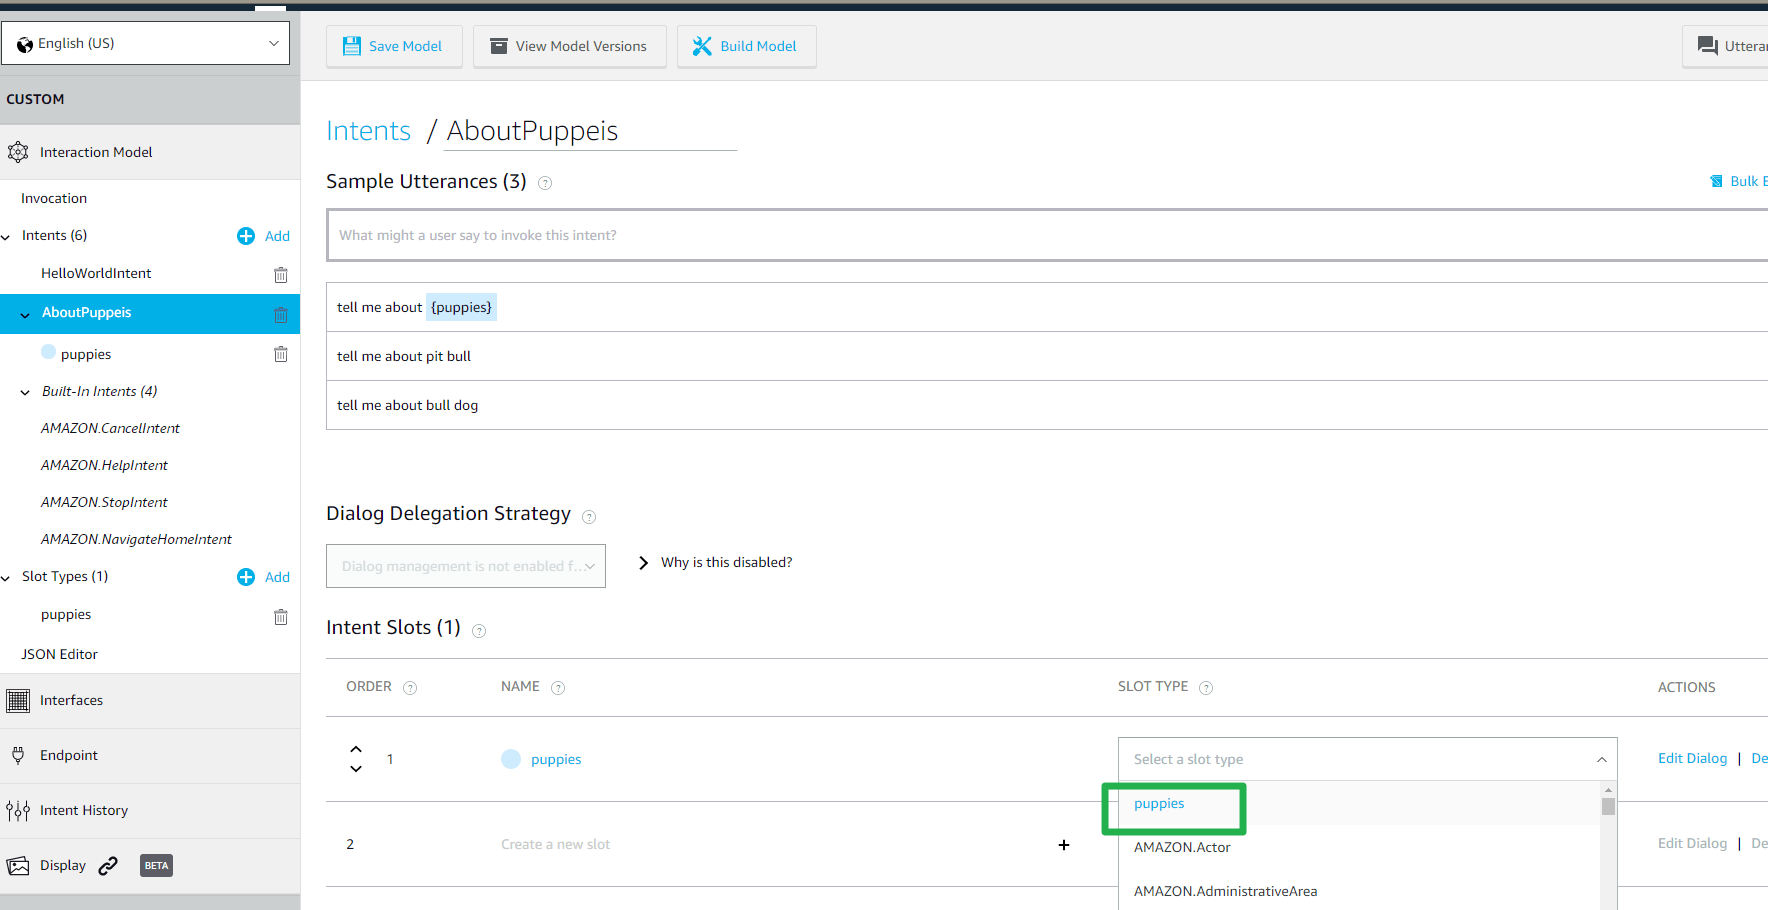
Now you can use the slot you just created.
Note: Slots replaces the original value in the utterance with
the slot name in curly brackets ({ }).
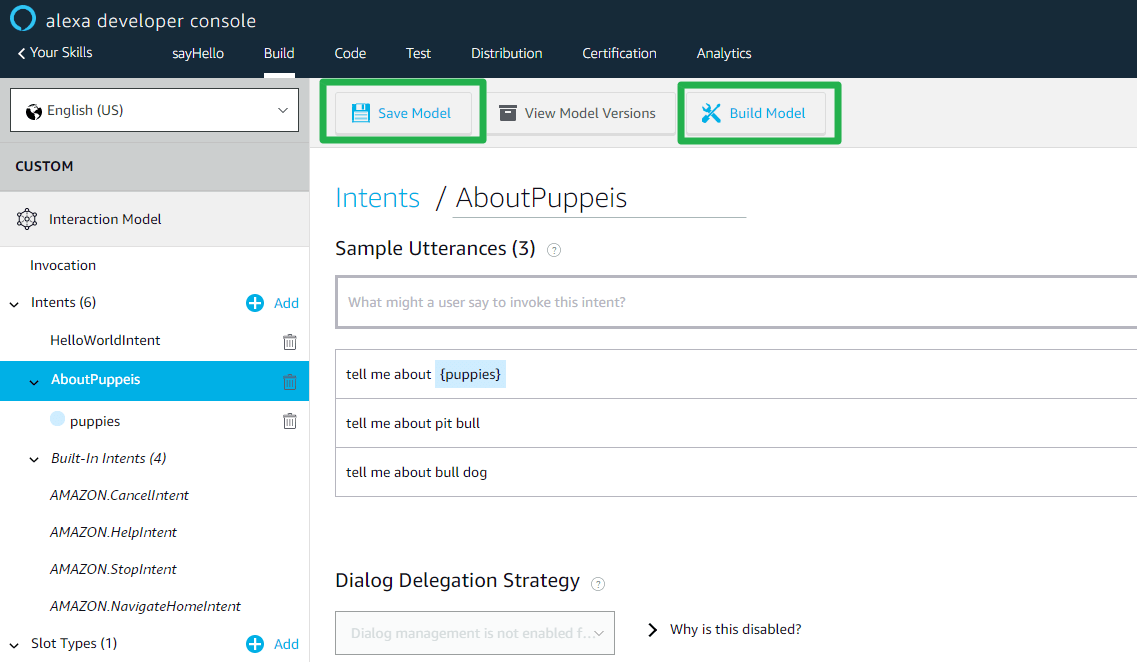
Click on Save Model.
Click on Build Model.
Interfaces settings
Depending on the skill you will be building, you will need to choose the Interfaces on which your skill interaction would take place. Because, we are building a simple skill and depending on your Alexa device we would be using the three interfaces;
- Audio Player: The AudioPlayer interface provides directives and requests for streaming audio and monitoring playback progression.
- Display Interface: Echo Show allows skill developers to create skills for Alexa that use both screen and voice interaction.
- Video App: The VideoApp interface provides the VideoApp. Launch directive for streaming native video files in Echo Show.
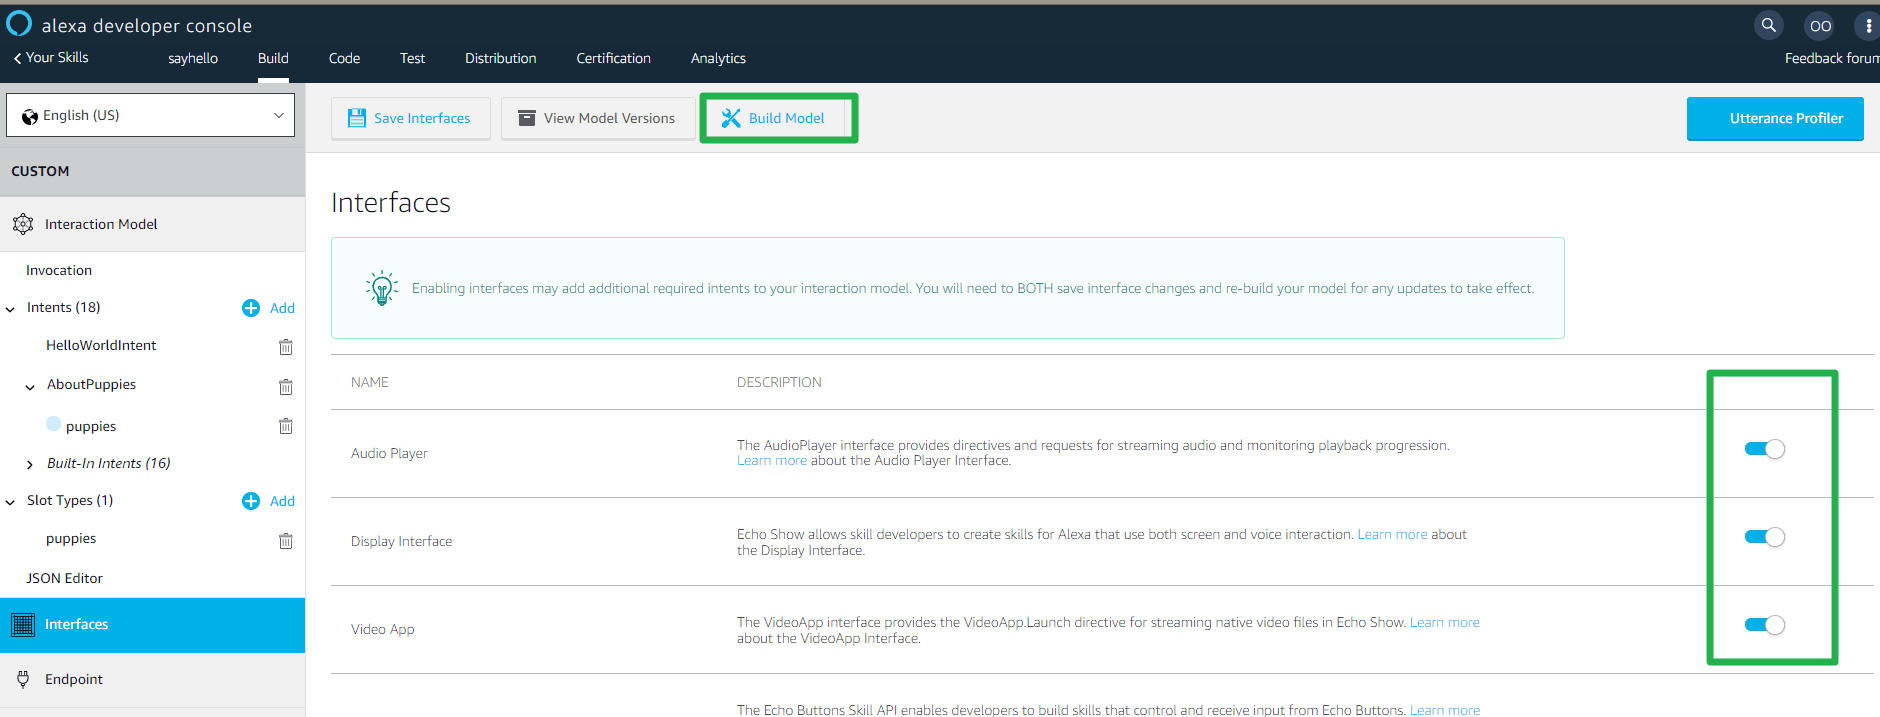
Enable the Audio Player.
Enable the Display Interface.
Enable the Video App.
Click on Build Model.
Endpoint settings
The Endpoint will receive POST requests when a user interacts with your Alexa Skill. The request body contains parameters that your service can use to perform logic and generate a JSON-formatted response. One of the recommended Service Endpoint is the AWS Lambda ARN. To get started with the AWS Lambda ARN, you need to create a AWS account.

Fill out the necessary information
Once you’ve created the account
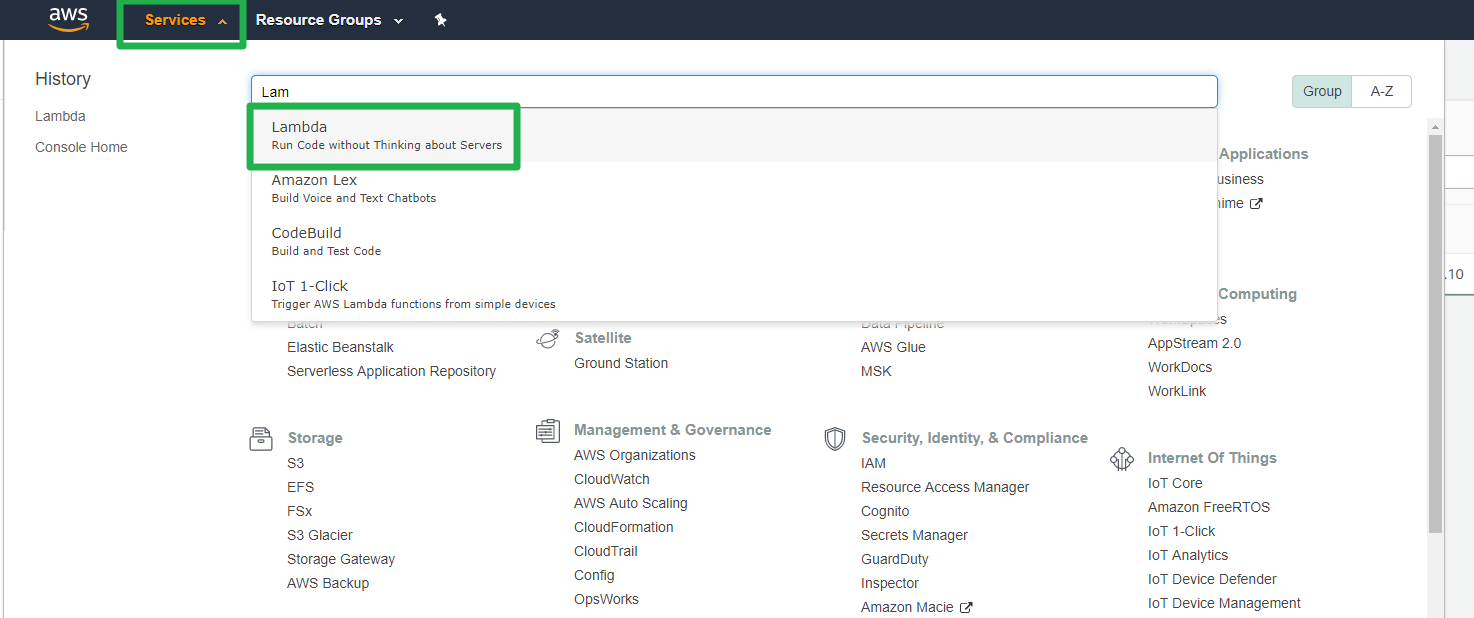
Click on Services.
Search and click on Lambda.

Click on create function.
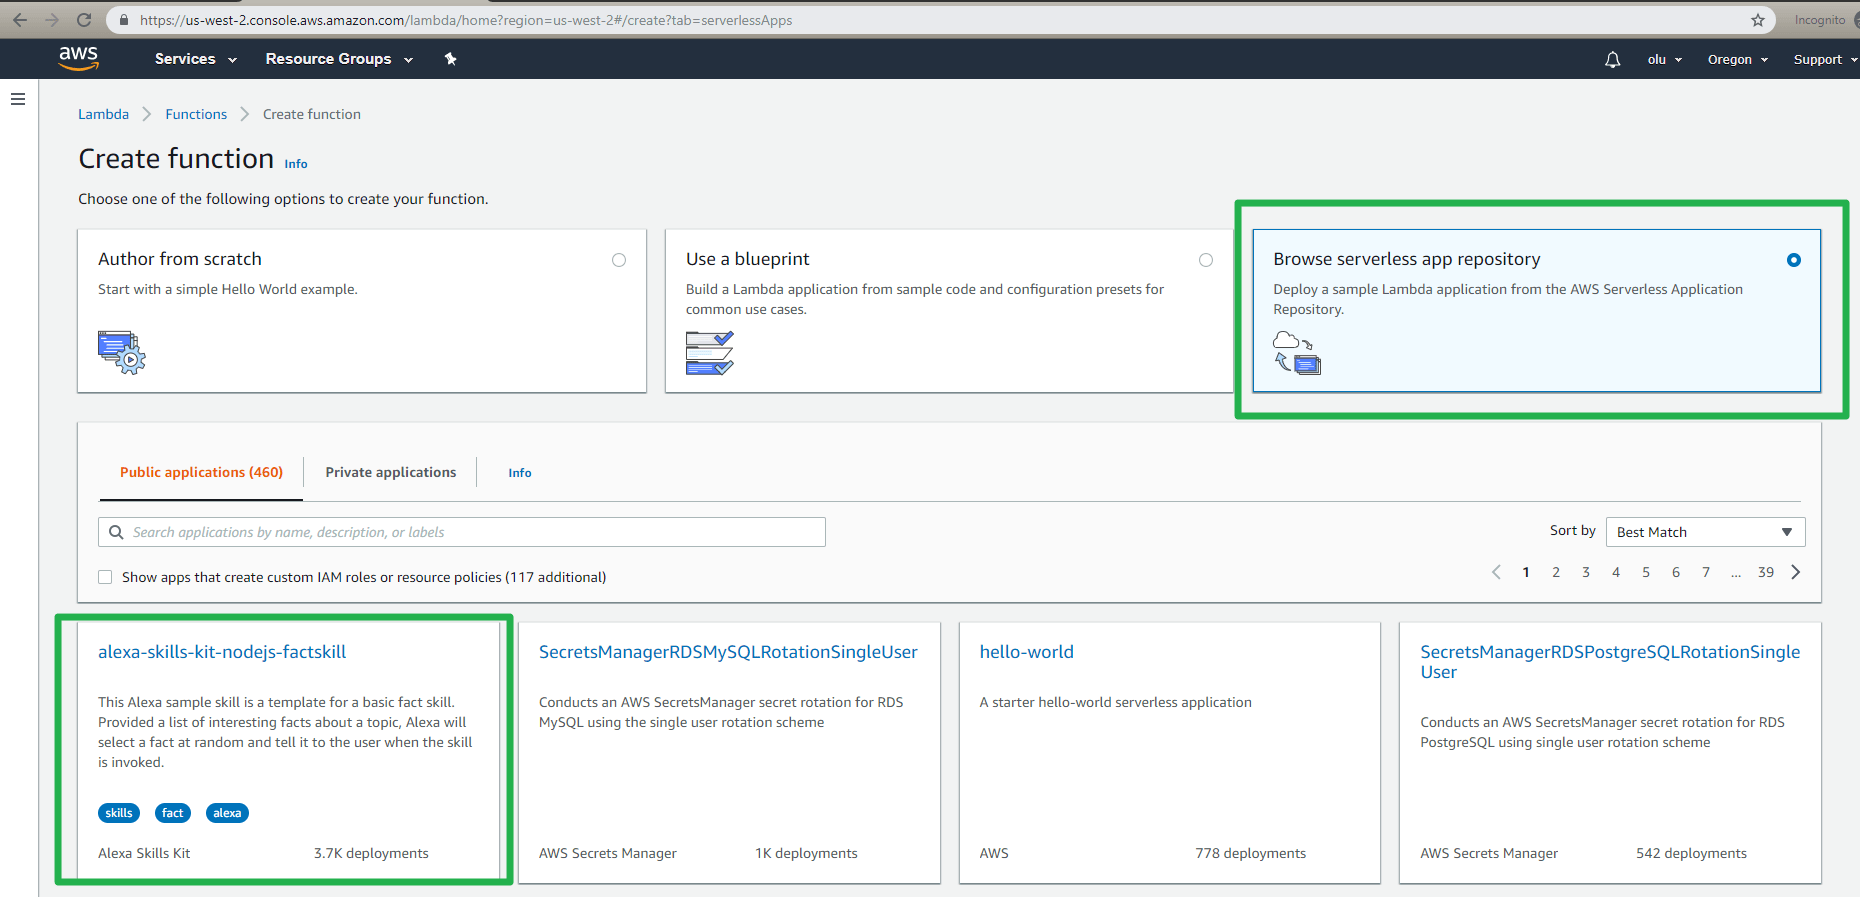
In the Lambda Service
Click on Browse serverless app repository.
Click on alexa-skill-kit-nodejs-factskill.
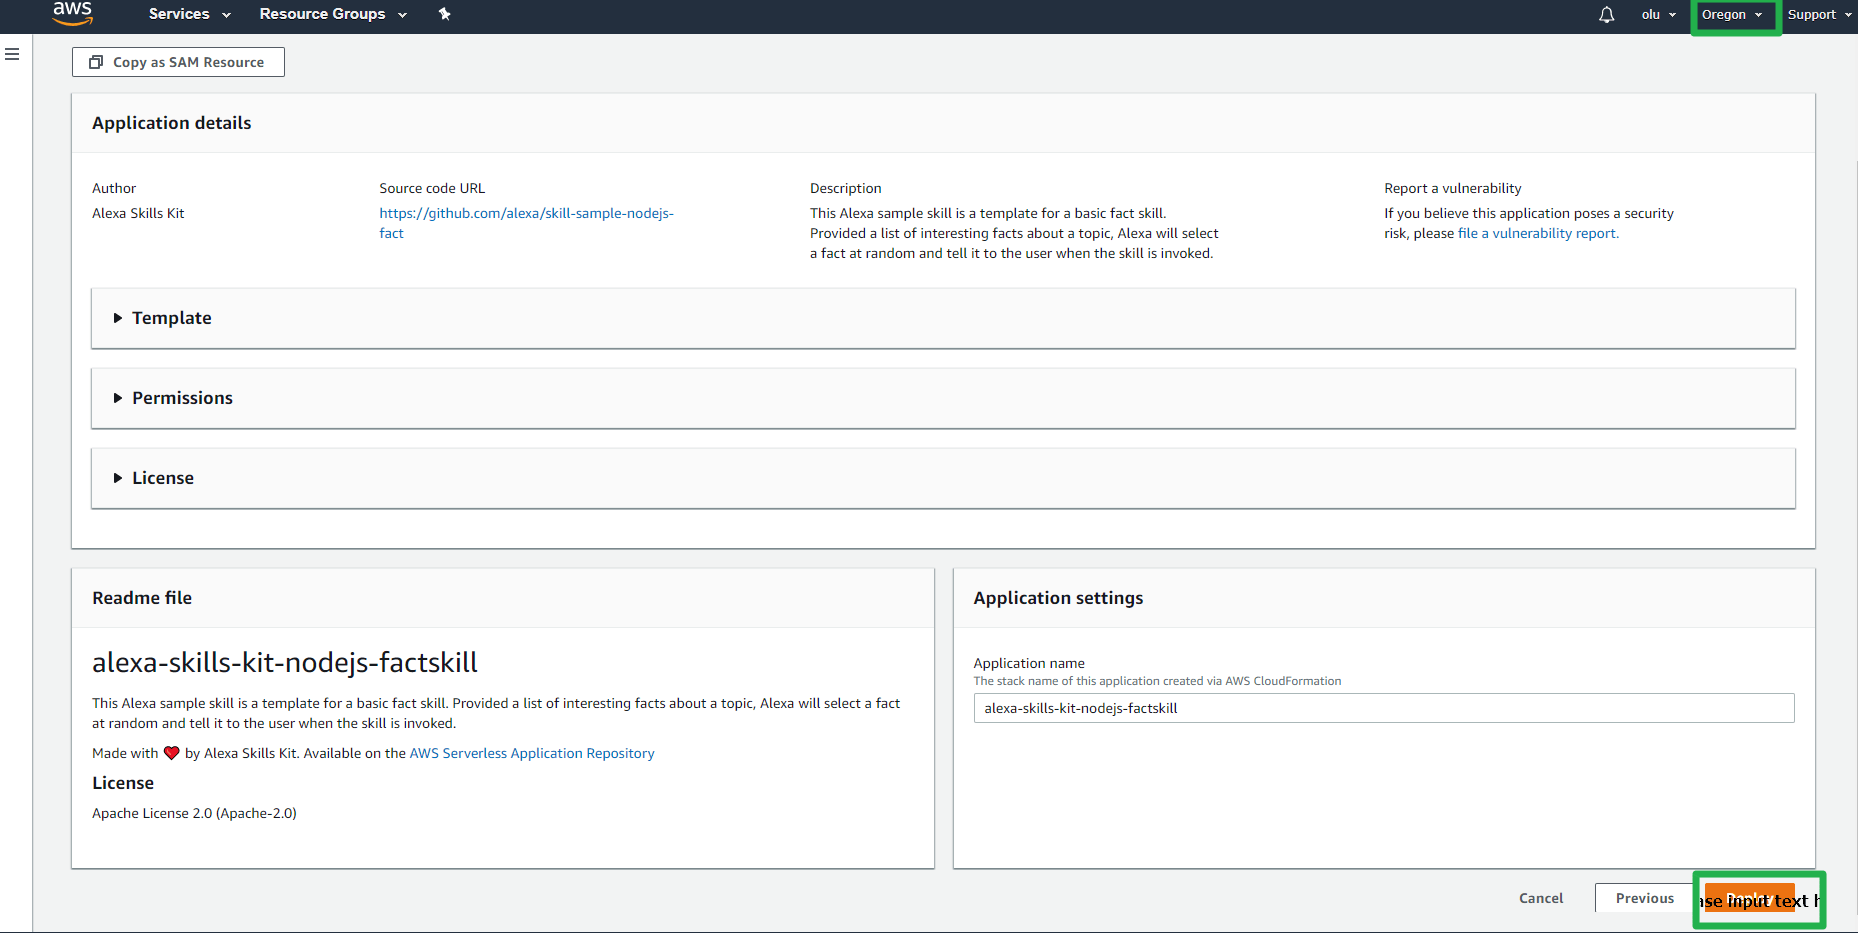
Click on Deploy.
Note: Application name can be changed too.
Make sure your Region is set to your current/closest region
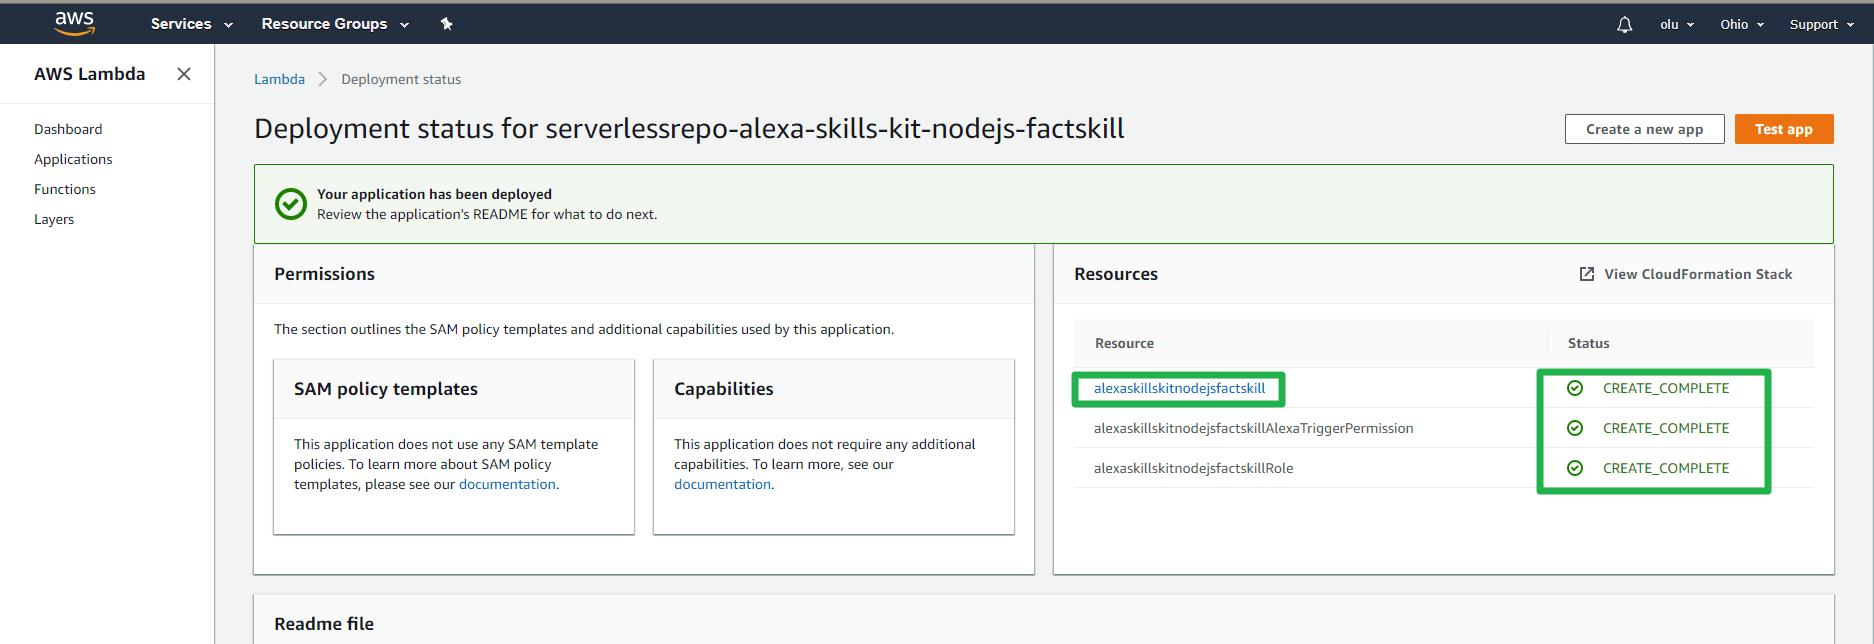
Once application has been deployed
Click on alexa-skill-kit-nodejs-factskill.
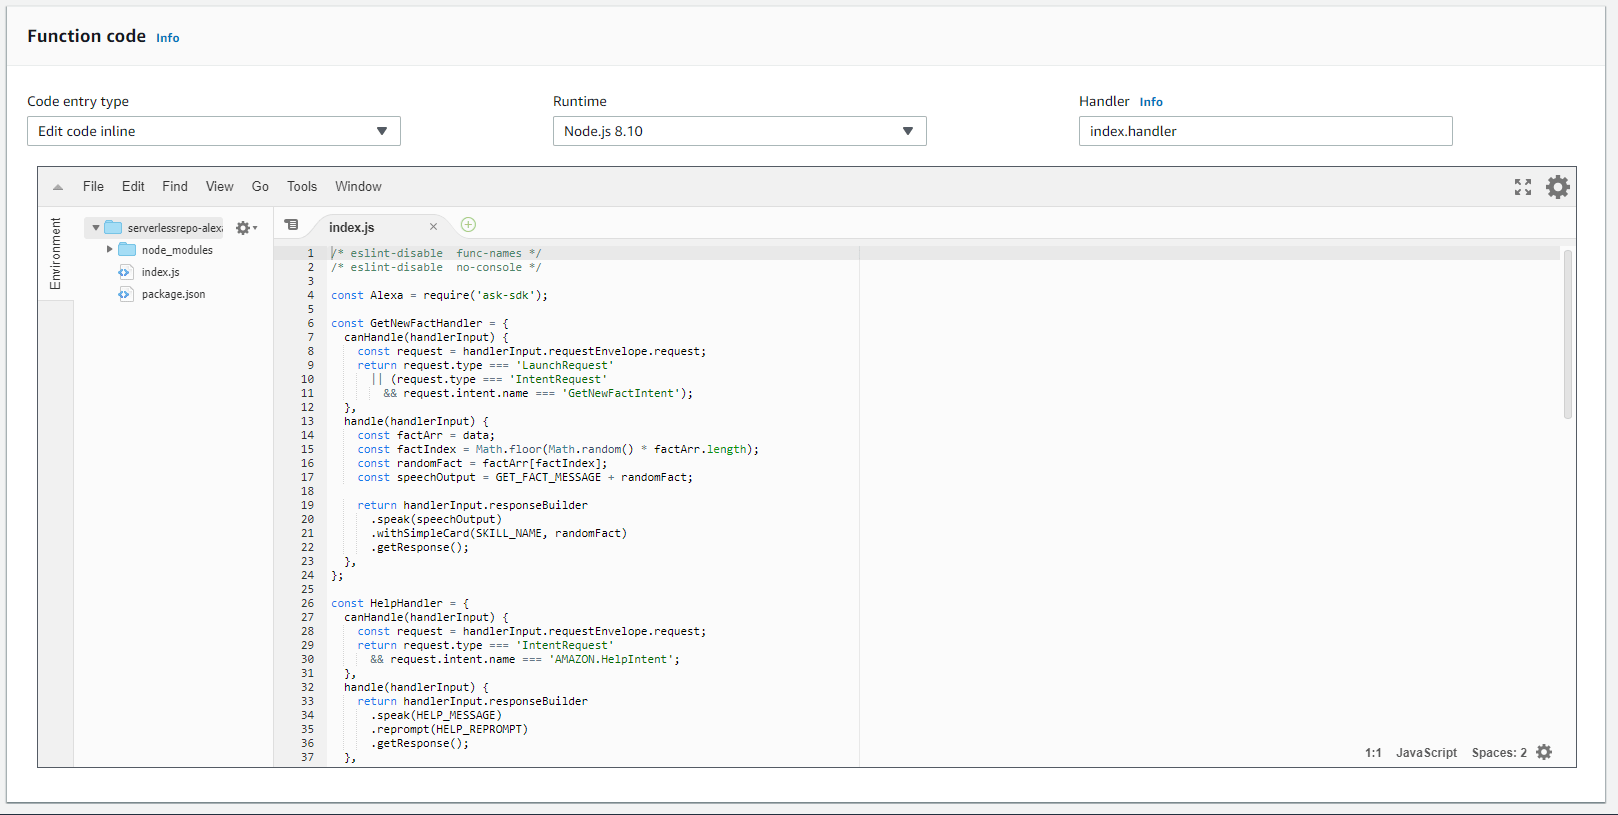
Scroll down to the code section.
Note: This is where all the Handler and Intent code are being deployed from to your skill.
Next Steps
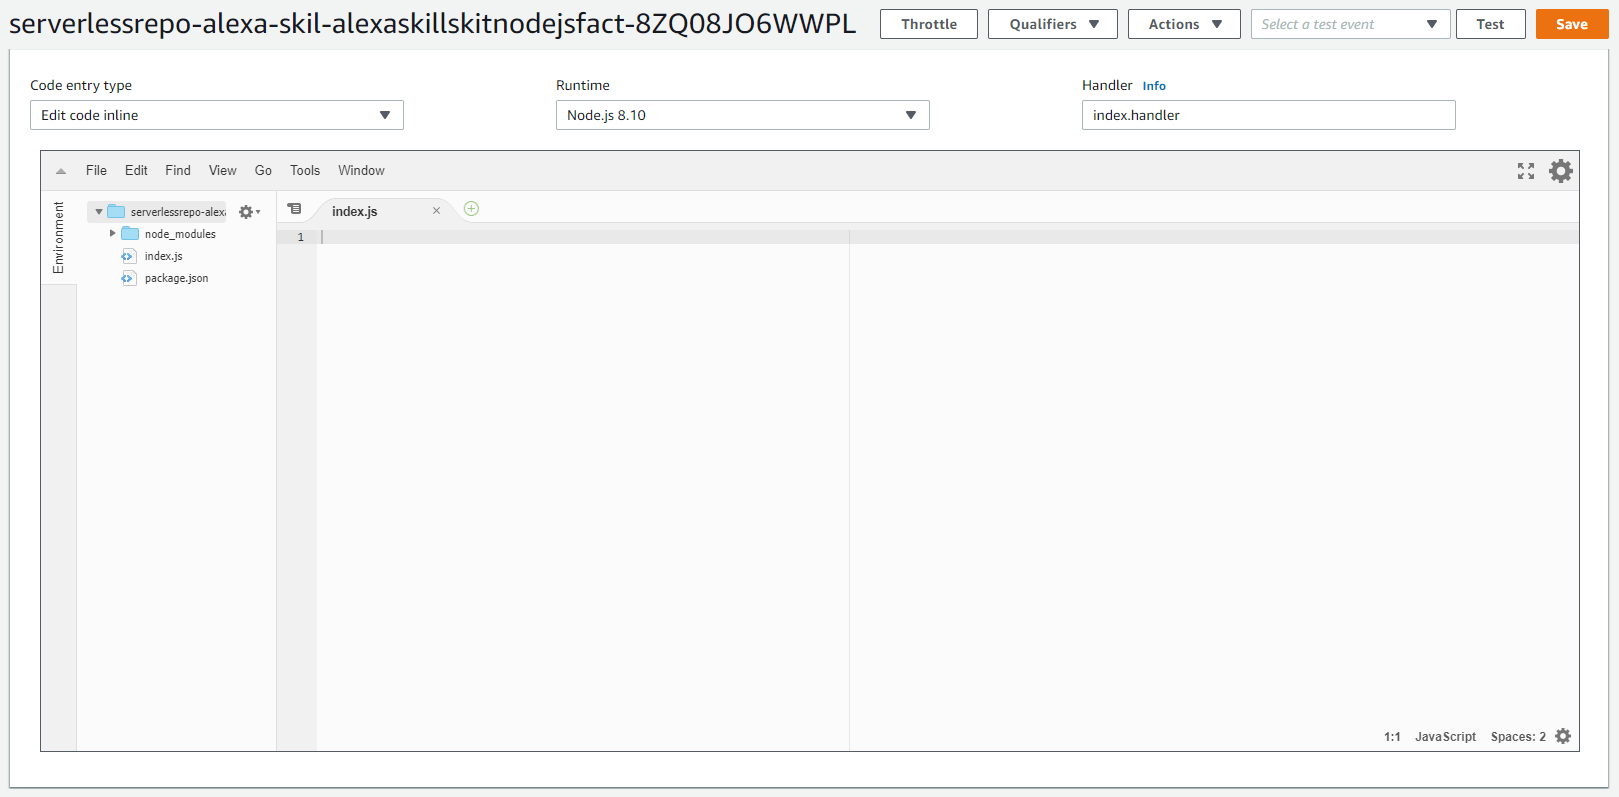
Clear the code in the new Lambda function you just created
Now go the tool Alexa code generator in a new tab. The Alexa code generator will basically take the JSON representation of your skills intents and create a Node.js code.
Go back to your developer site and click on the JSON Editor tab
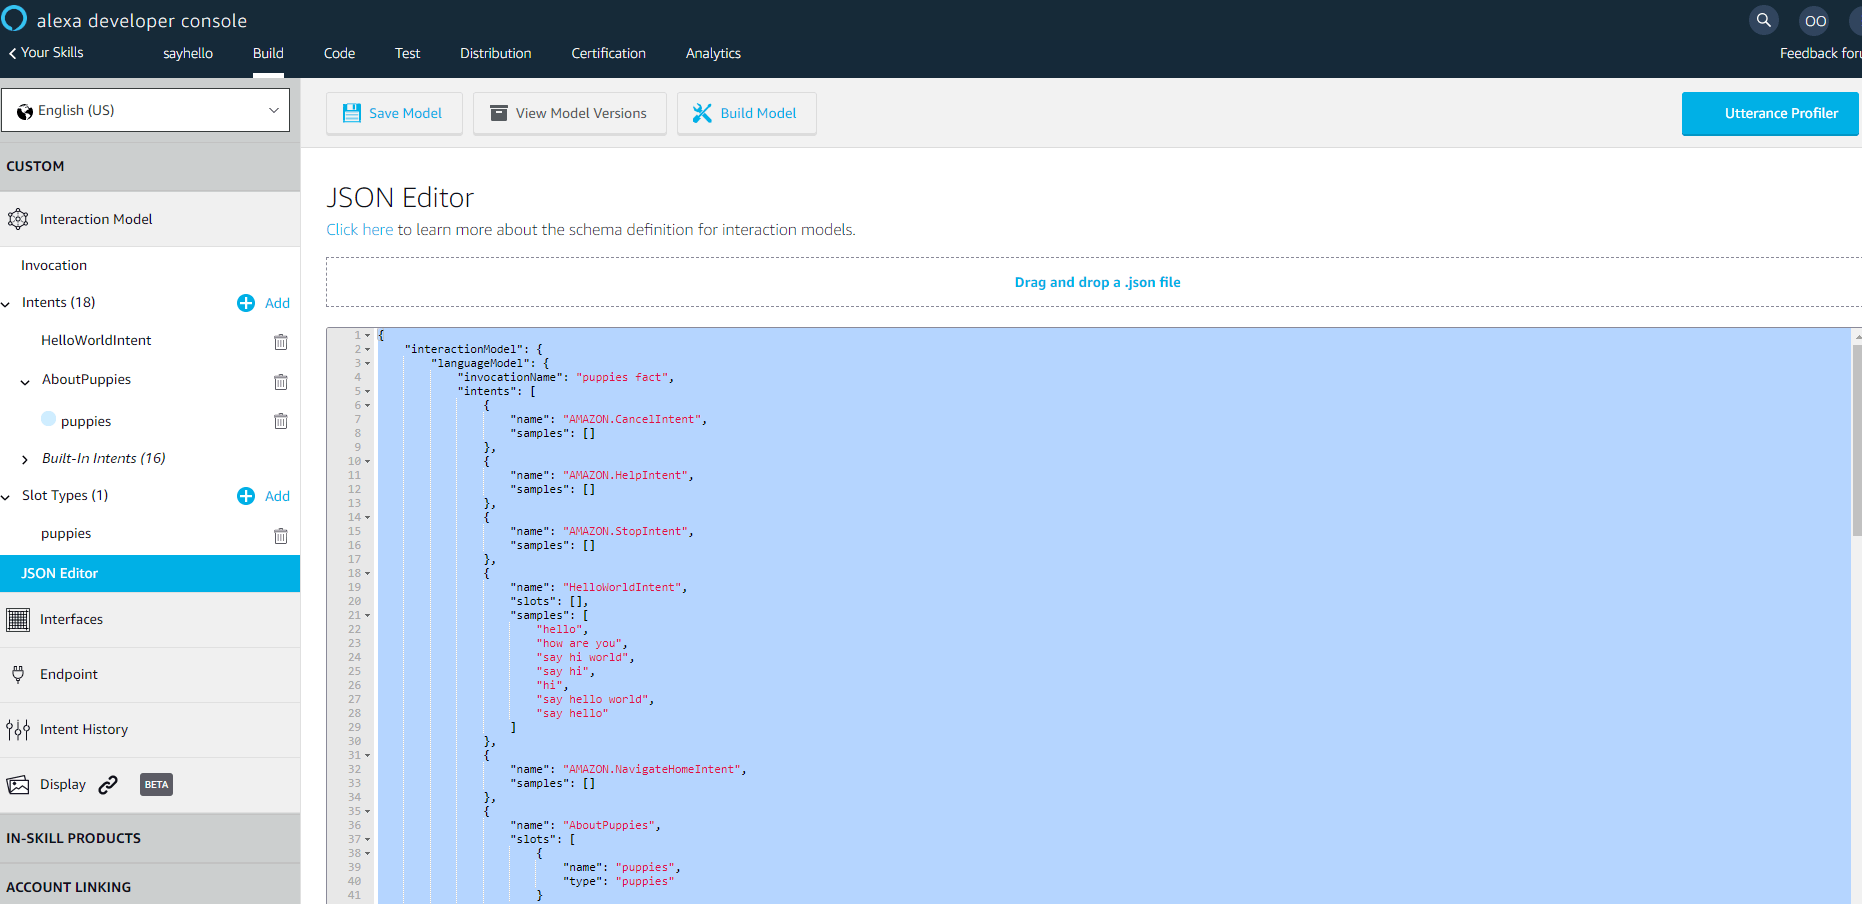
In the JSON Editor tab
Copy the JSON code.
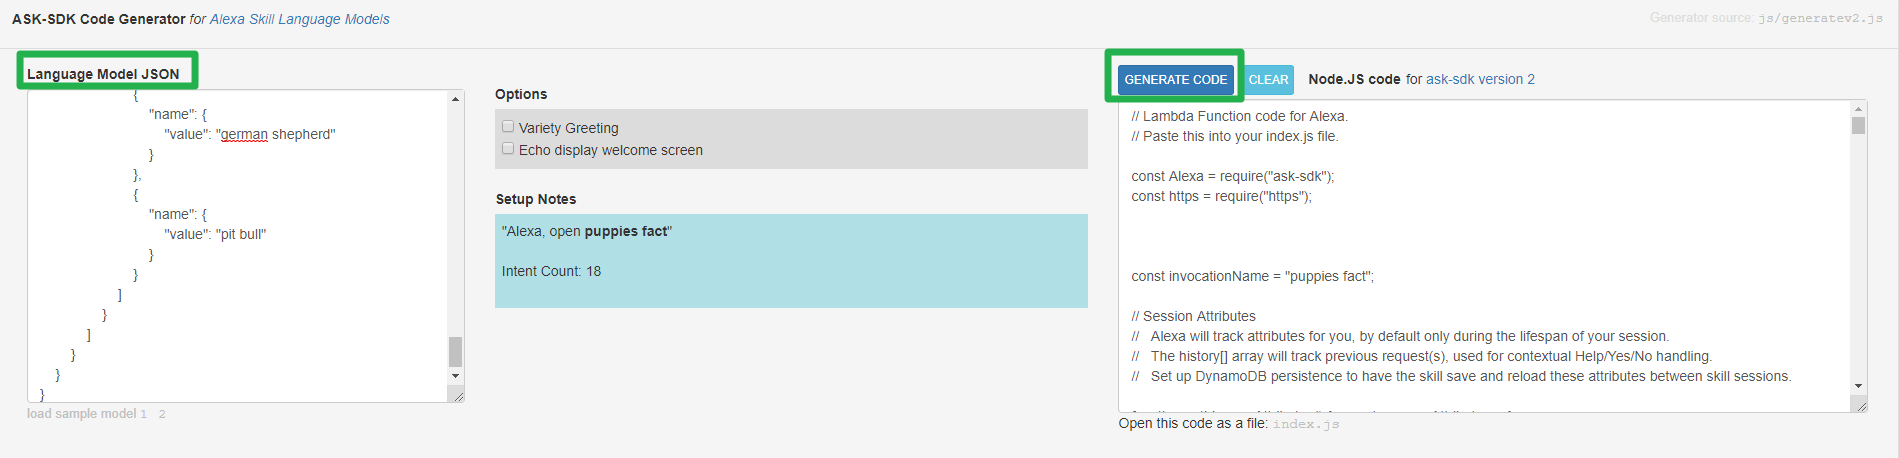
Go to the Alexa code generator tab and
Paste the JSON code in the Language Model JSON.
Then click on GENERATE CODE to generate a Node.js code.

Copy the Node.js code and paste it in your empty Lambda function
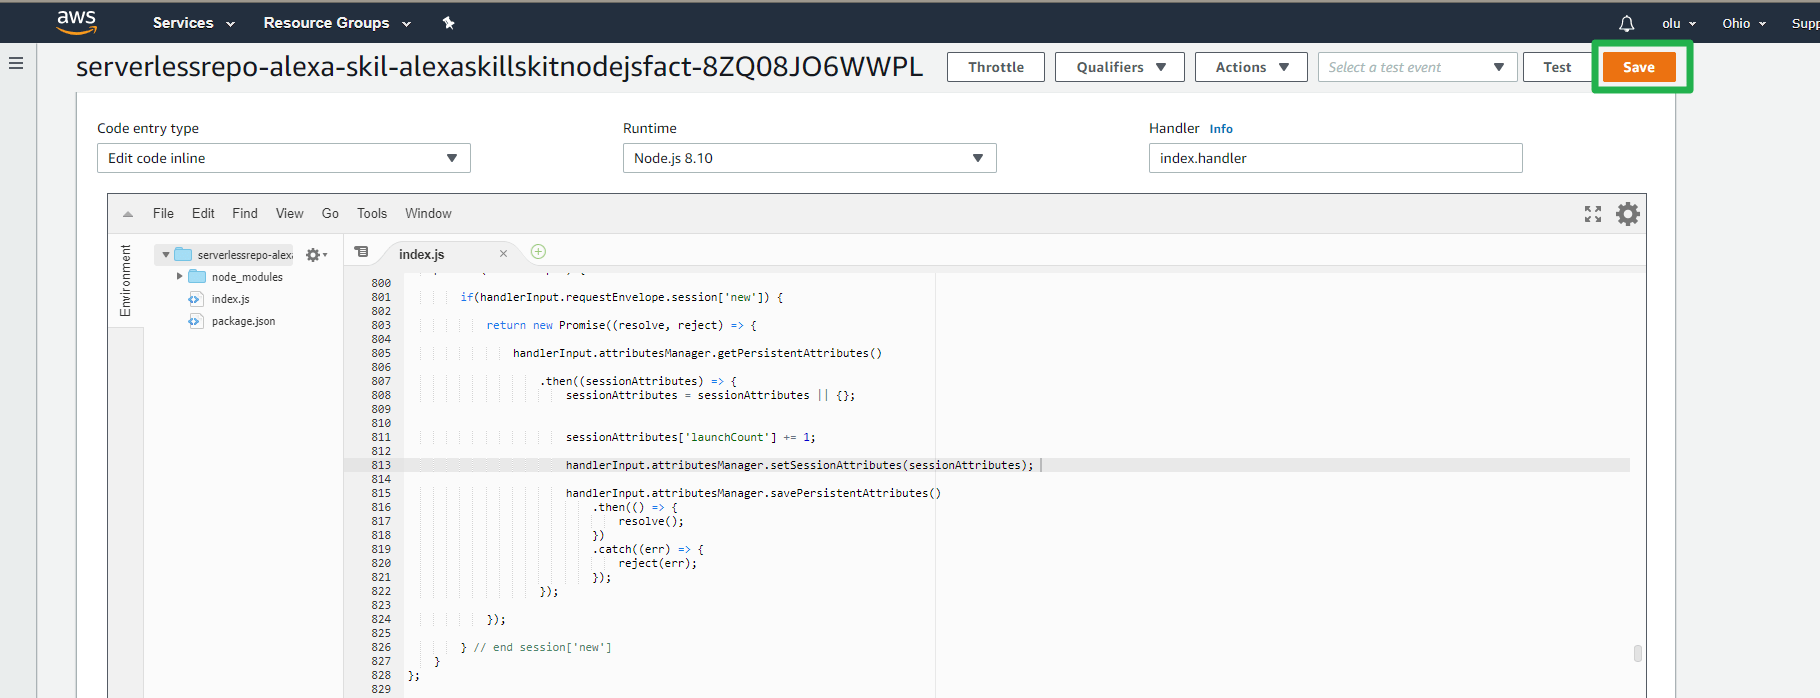
Paste the Node.js code in the empty Lambda function.
Click Save
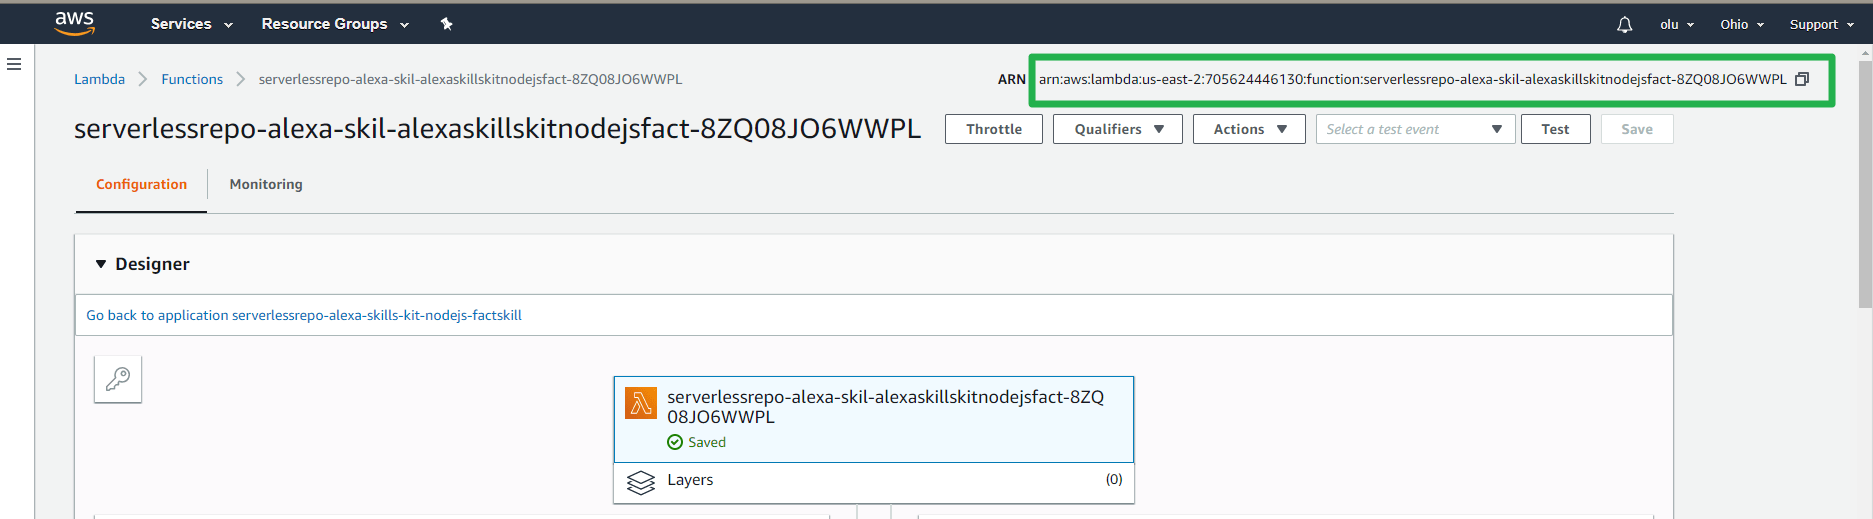
Copy the ARN (Amazon resource name) at the top part of your Lambda Function
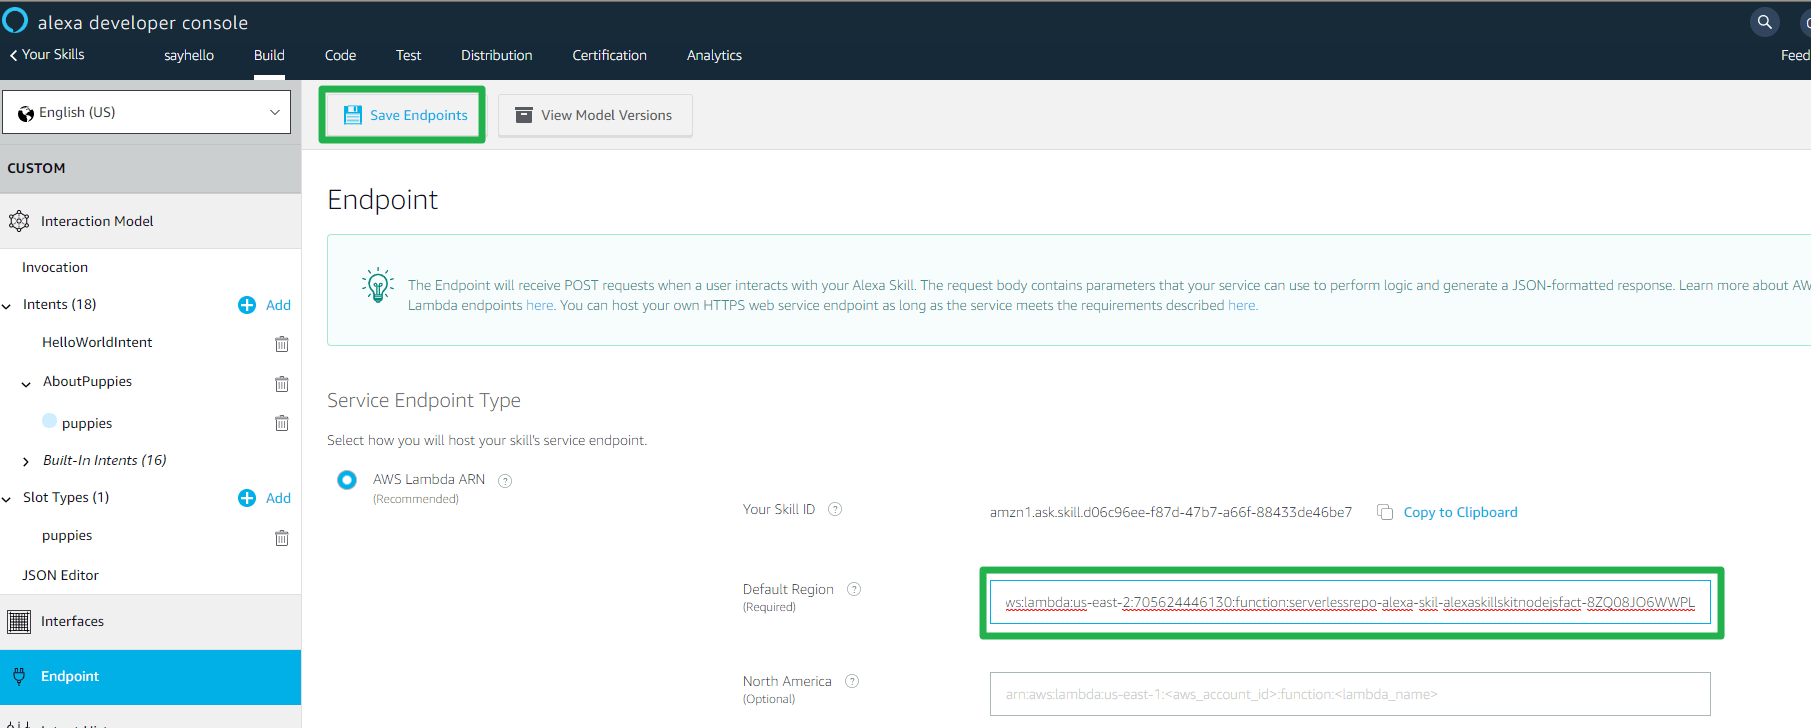
Back in the Alexa developer site click on the Endpoint tab
Paste the ARN (Amazon resource name) in the Default Region.
Click on Save Endpoints
ACCOUNT LINKING AND PERMISSIONS
If you are developing a skill that will require you to link external account or would require permissions such as location and name, then you want to go into this section. If not, you are ready to test your skills.
Testing your skill
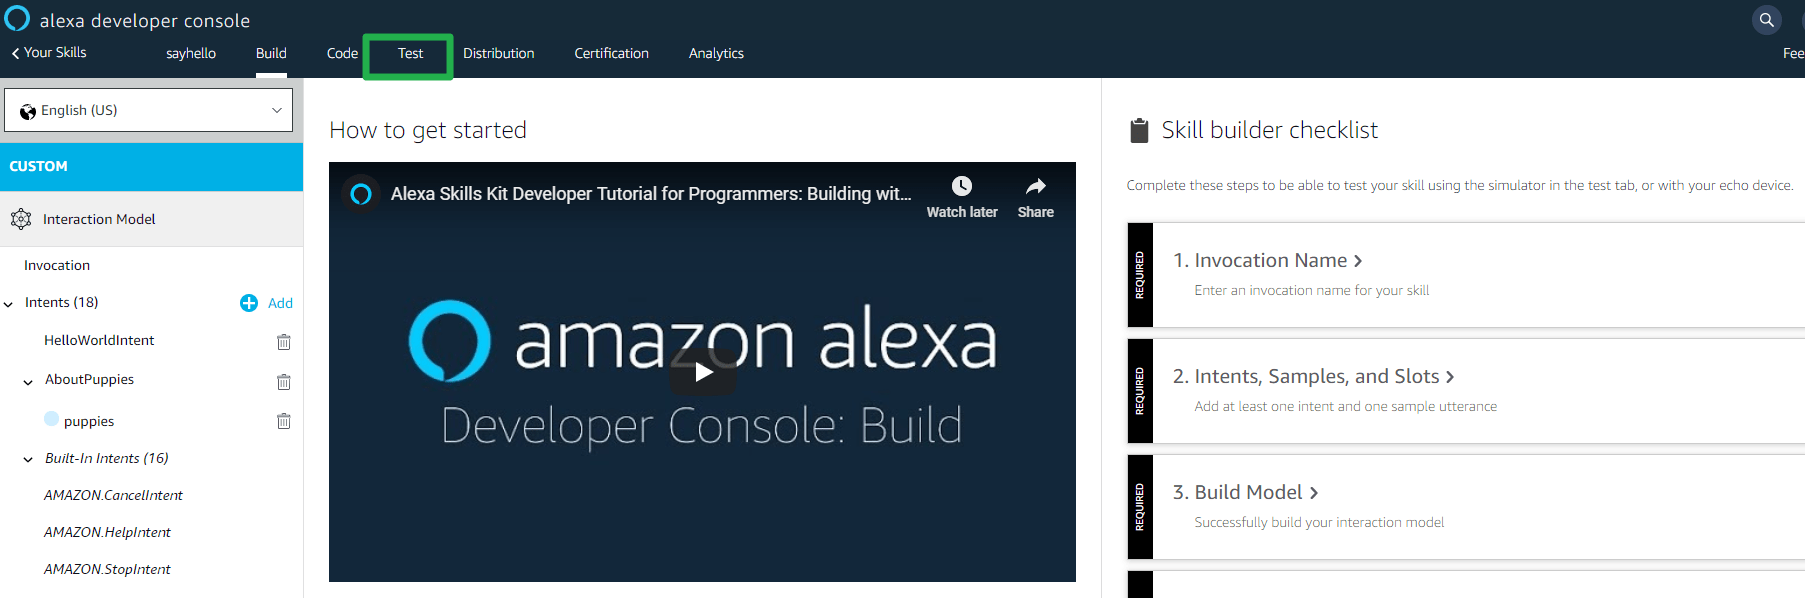
Click on Test at the top part of the developer site.
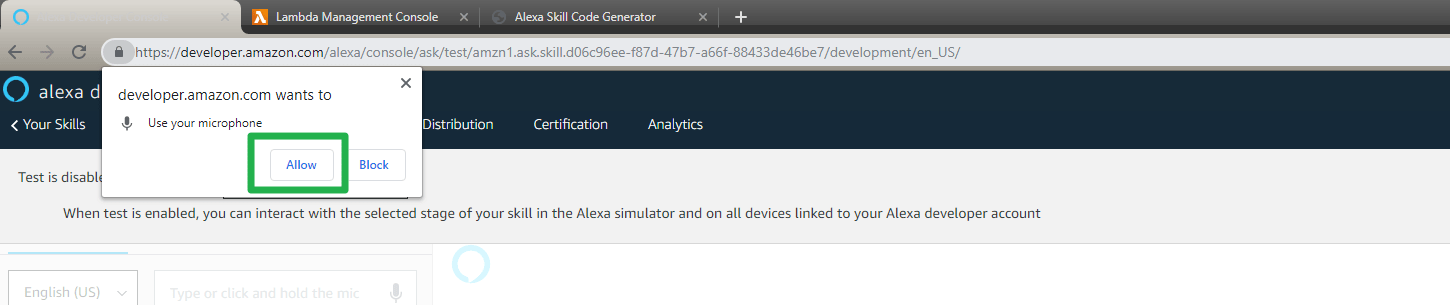
Allow the website to use your microphone.
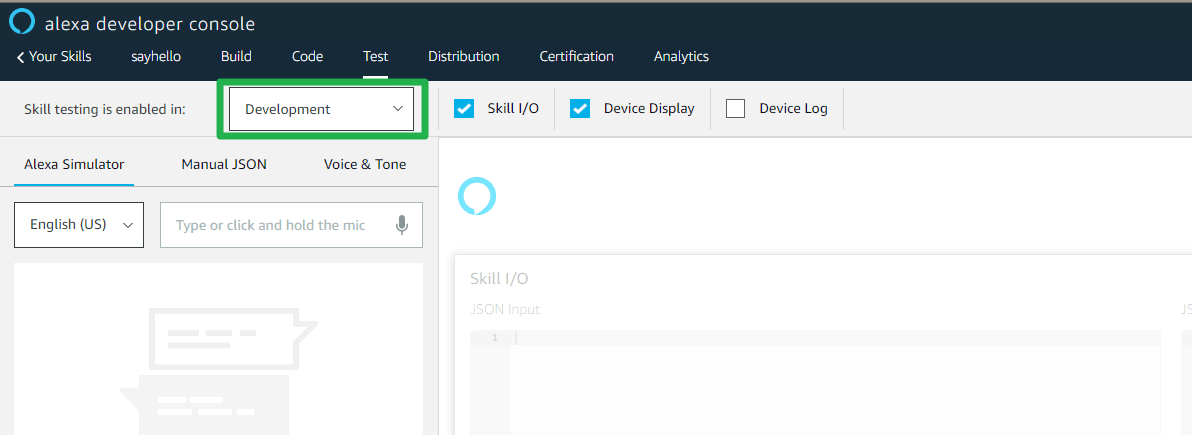
Select Development in the Skill testing is enabled in.
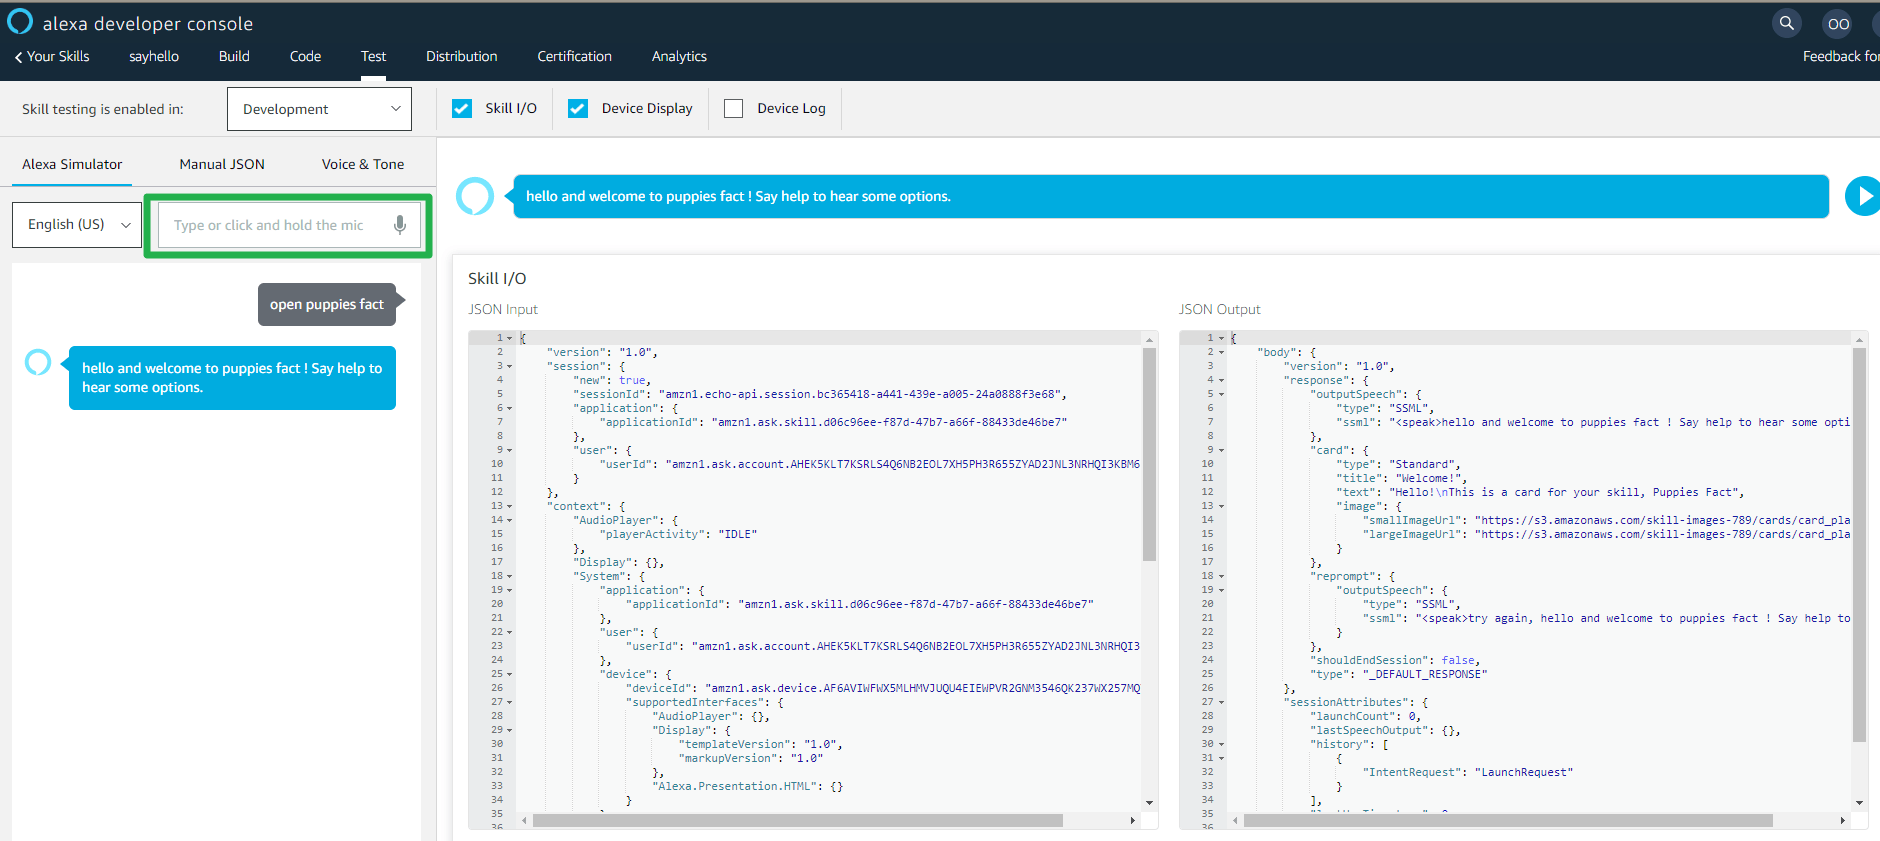
To put your skill into interaction test with Alexa
Type open "your invocation name".
Note: To get it to work perfectly, you have to follow this rule.
If you forget your invocation name, you can always go back and look it up.
If Alexa responds to you interaction by saying
hello and welcome to “your invocation name” ! Say help to hear some options.
then your skill is up and live.
What Next
Now that your skill is up and live, you can start to modify the Lambda function code to your preferences. You can start by changing the default response you get from the intents in lambda code, to anything you want.
- Let’s start with the Launch request Handler. This handler is what Alexa would say back to you anytime you open your skill. We can modify this handler to give out some information about what our skill does.
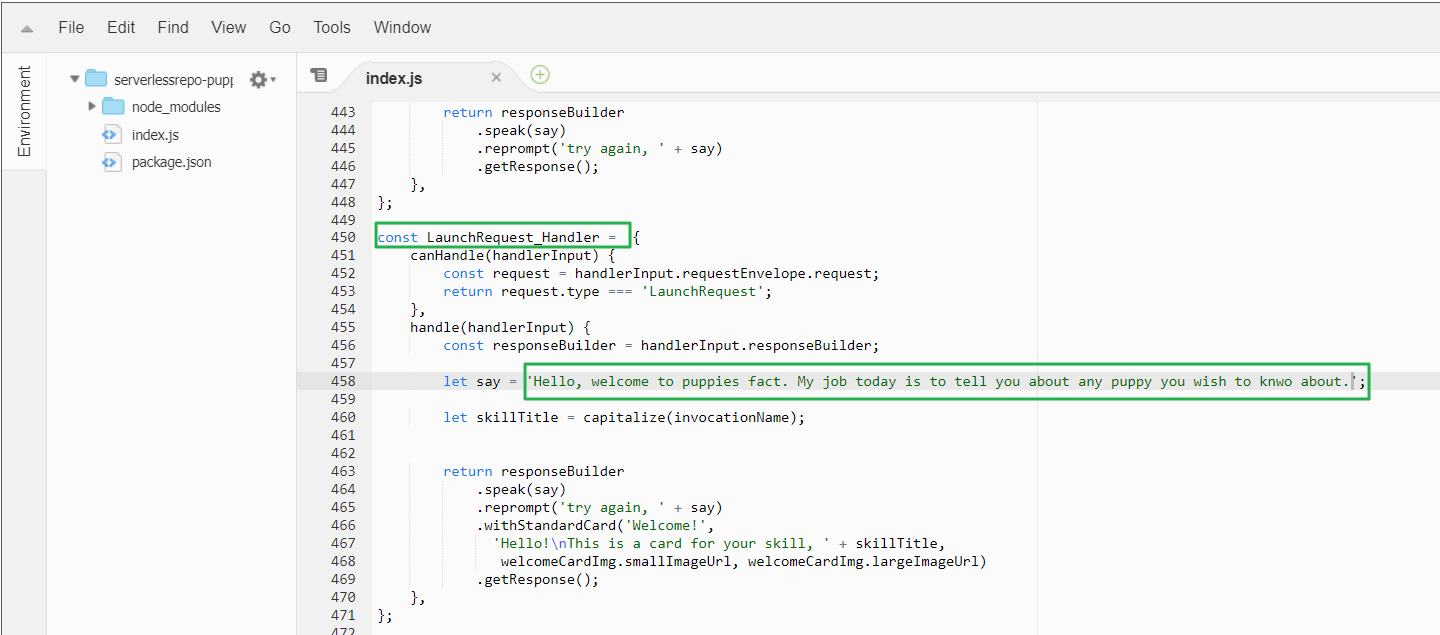
In the Lambda function, look for
const LaunchRequest_Handler
Then change the say variable into an detailed information of what your skill does.
Click on Save.
Back in the Alexa developer console

Type stop.
Then type open "your invocation name".
Note: If you don't notice any changes, go back to the Lambda code. Save
and try this step on more time
- Let’s do the Cancel Intent Handler. This handler is what Alexa would say back to you anytime you decide to stop/close your skill. We can modify this to say something nice when prompted to stop.
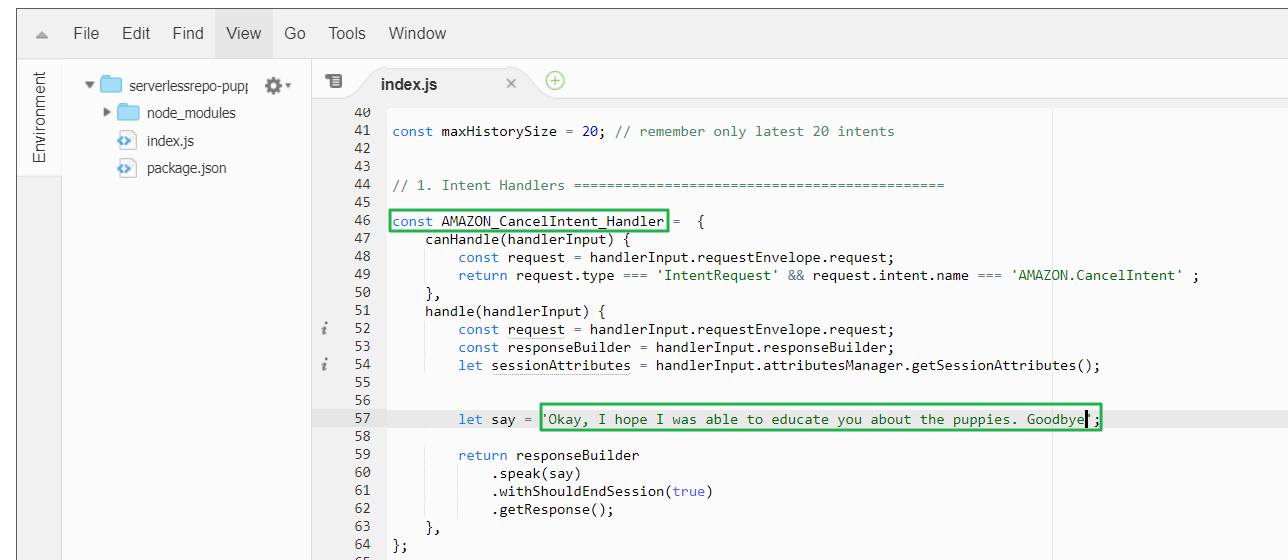
In the Lambda function, look for
const AMAZON_CancelIntent_Handler
Then change the say variable into something nice.
Click on Save.
Back in the Alexa developer console
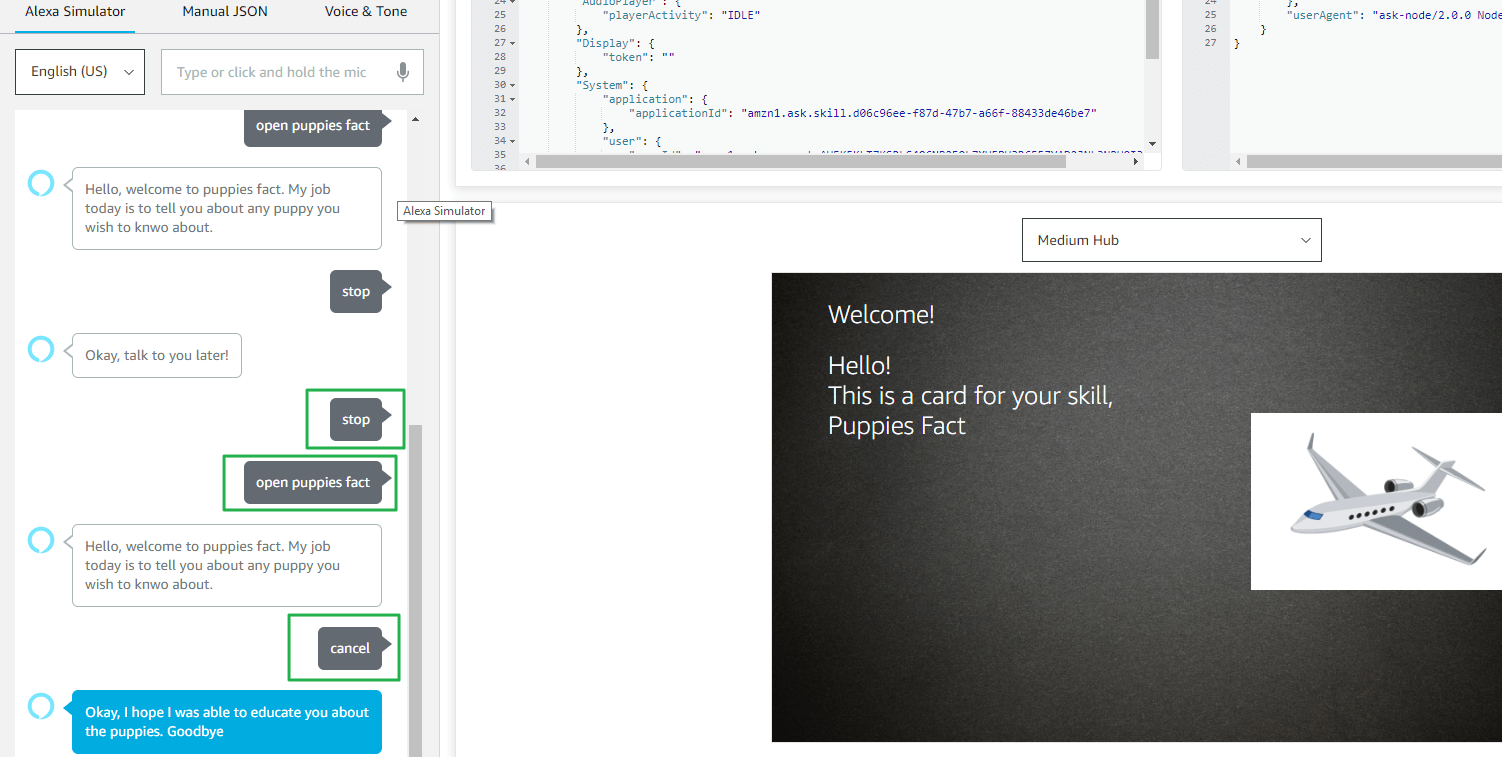
Type stop.
Then type open "your invocation name".
Type cancel.
Note: If you don't notice any changes, go back to the Lambda code. Save
and try this step on more time
- Now let’s work on the Custom Intent. This intent will be modified depending on what your skill is doing. In this case, since we have a slot and different utterances on how the skill would be called. A little bit of coding experience would be needed.
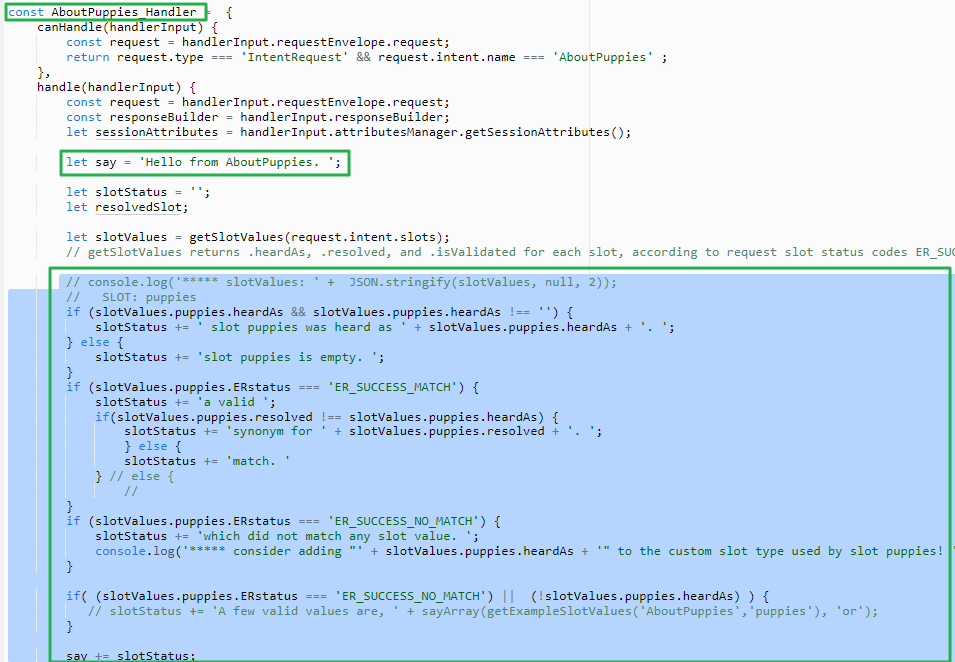
In the Lambda function, look for
const  "your custom Intent"_ Handler
Then delete all the highlighted part of the code above
Click on Save.
.
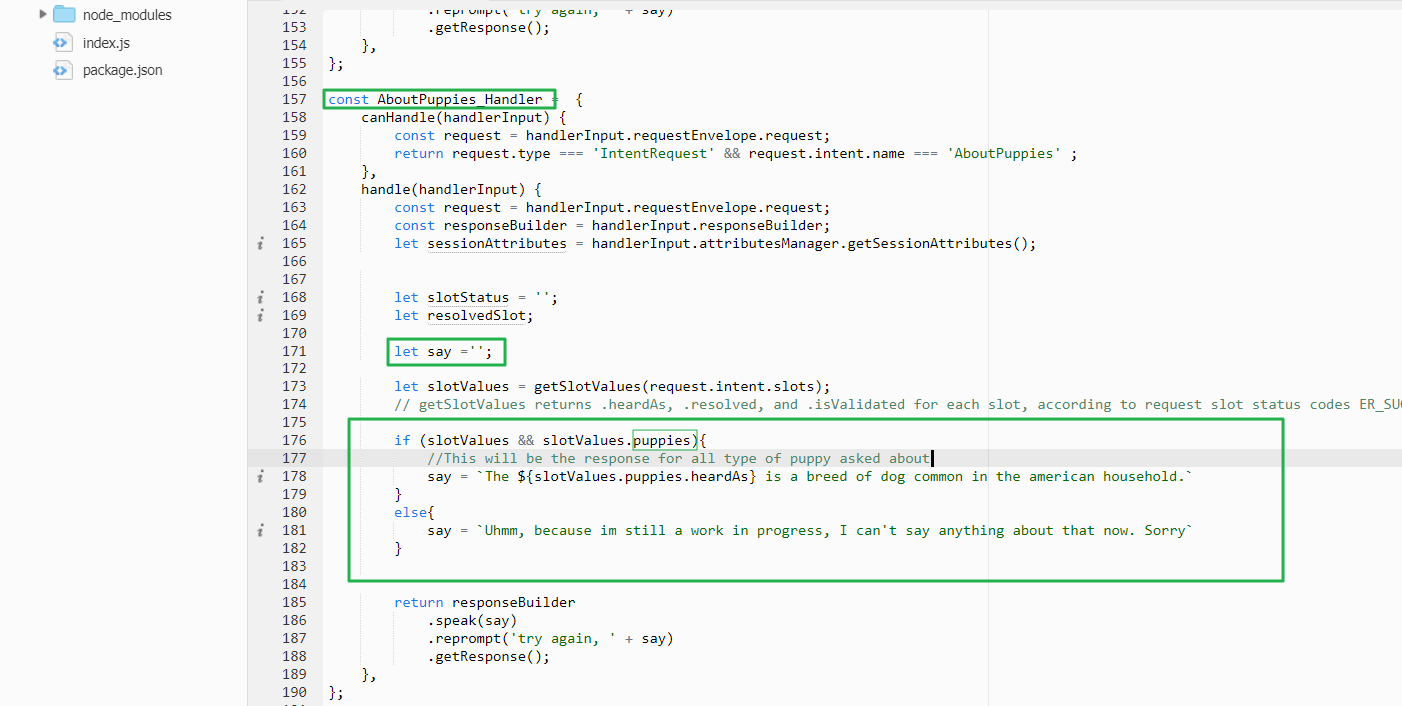
In the custom Intent"_ Handler function
Declare say variable as an empty string ('')
Create an if-else conditional statement.
In your if block, let your condition be
(slotValues && slotValues.'slotName')
You can decide what Alexa response should be with the say variable.
In your else block,
Just make Alexa respond if the statement said can't be found in the slot your created
Click on Save.
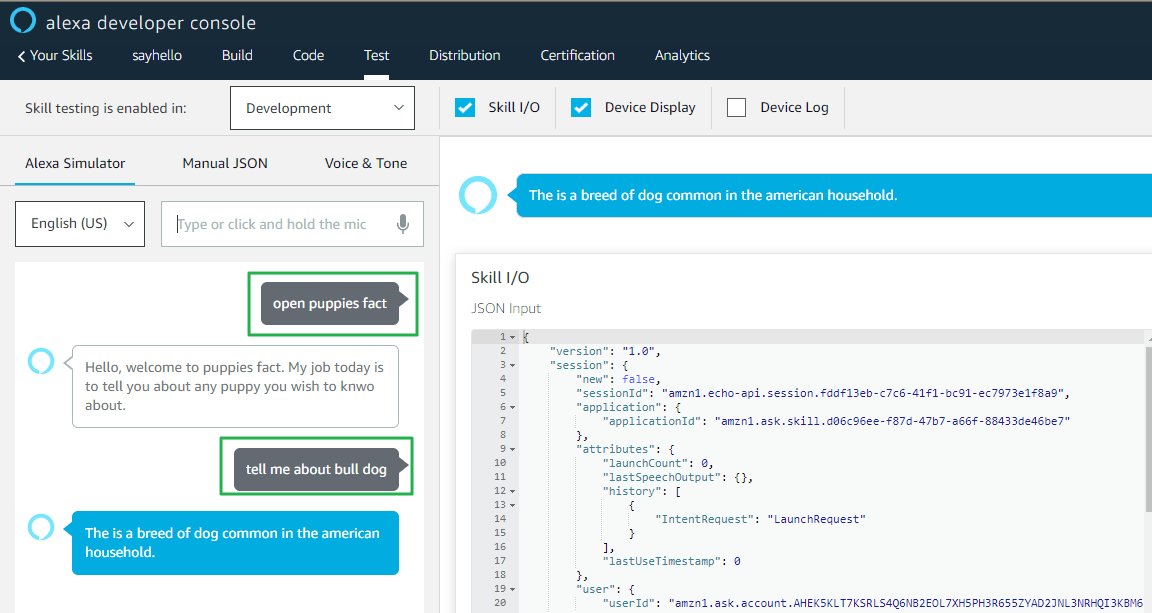 Back in the Alexa developer console
Type open "your invocation name".
Type one of the utterances you declared when creating the skill and wait for Alexa
to respond with the response you just defined in the custom intent.
In conclusion, this is just a beginners guide on how to build a skill for Alexa. This should at least get you going. Depending on what you want to use this skill for, you can always work on this tutorial to perfect your skills. To learn more you can always go to the Amazon Alexa Skill kit to learn more.